


.jpg?cx=0.5&cy=0.5&cw=150&ch=120&blr=False&hash=13DE8EDEE0E1AF98CC5D704B05EC64EE)


How to Create the Ultimate Smoky Eye
November 01, 2019

The red lip, the contour, the cat eye — all of these classic makeup looks hold a special place in our hearts. However, none of them make us feel as bold and brazen as the timeless smoky eye.For decades, this look has been embraced and used for those moments we need to give our faces some sultry oomph.
Although it’s one of our favorites, we’ll be real here, the smoky eye is one of the toughest techniques to master. One overzealous stroke of an eyeshadow brush can leave you looking less like a sultry seductress and more like you could use an ice pack. But you know what they say, if at first you don’t succeed…ask a makeup artist. We talked to some of our favorites, and they had ten genius tips to take your smoky eye to the next level.
TIP 1: HIGHLIGHT FIRST
L’Oréal Paris Pro Artist Mirna Jose likes to begin not with the dark eyeliner, but with the highlight color on the brow bone. “Often people blend the darkest shade past the crease. Starting from the brow bone will ensure that the gradient is not negatively affected.”
TIP 2: APPLY EYESHADOW BACKWARDS
Jose finds working in color gradient that builds (rather than fades) works best no matter your eye shape. Start from the brow bone then, “follow your highlight with a medium color from where your highlight ends to where your crease begins and blend. Proceed with a darker medium shade and blend using a windshield-wiper motion; concentrating on the crease — be sure not to go as high as the previous color.” Finally, finish with the darkest shade applied to your lid and close to the lash line, and then blend again.
TIP 3: USE EYE PENCIL AS A BASE
If you want to intensify your smoky eye, Jose recommends this trick: “Apply a black eyeliner as a base. Smudge the pencil all over the lid. Try the Maybelline New York EyeStudio Lasting Drama Waterproof Gel Pencil. Once complete, add the eyeshadow and blend.” Even when going for greater color concentration, it’s important to blend, blend, blend.


TIP 4: KEEP IT CLOSE TO LASH LINE FOR DAYTIME
For a softer look, keep the application subtle. “A daytime smoky eye can be achieved by using a smoky eyeshadow smudged around the eye very close to the lash line,” says professional makeup artist Dell Ashley. “To keep it from looking too dark, line only the inside waterline of the eye,” and skip lining the bottom lash line all together.
TIP 5: CONSIDER YOUR SHAPE
Not all eyes are created (or shaped) equal. In turn, smoky eyes are not one-size-fits-all. “The first major consideration is whether or not the technique the client is requesting is correct for their eye shape and would it actually result in something unflattering,” says makeup artist Dan Wood. “For example, a classic smoky eye technique (dark at the lash line and blended up towards the brow) suits everyone, while something like a cut crease would only suit eyes without a deep socket. Also, a spotlight eye (lighter in the center) wouldn't suit anyone with a mono or hooded eye shape.”
For more tips on what would work best for your eye shape, follow this comprehensive guide.
TIP 6: MAKE SURE IT’S THE RIGHT SHADE
While it can definitely waver from its original format and color palette, the purpose of a smoky eye is to make the eye appear more seductive/sultry/catlike, says Wood. “The only major thing to ensure is that the final result should be size appropriate,” he continues. “There should still be a brow bone visible and the lower lashes should also still be visible, so make sure the color hasn't been taken so low they’re hidden.”
TIP 7: USE THE RIGHT TOOLS
Like the perfect beach wave or contoured face, tools are of the utmost importance when it comes to the perfect smoky eye look. And, lucky for us, you don’t need much to get your smolder on. “I have found that I only really need three brushes to achieve my desired look,” says Wood. “For starters, a large fluffy blending brush to apply lighter base colors and for almost all crease/socket work. Then, a much smaller tapered blending brush for adding blended definition to the deepest part of the crease. Finally a small paddle shaped flat brush for packing on the eyelid color(s), smudging out pencil liners and adding further definition to the crease.”
Makeup artist Astrid Lam says that keeping the smoky effect in mind is key when it comes to selecting the right tools. “I try to stay away from stiff brushes because it will just make it harder for you to blend all those eyeshadows together,” she says. Wood adds that he avoids sponge applicators as they “offer nothing in the way of blending and the handles are so small the pressure is always too intense, so the overall result is patchy and uneven.”
TIP 8: PLAY WITH DIFFERENT COLORS & TEXTURES
In its purest form, a smoky-eye palette contains charcoal grays, blacks and deep purples (like in Urban Decay’s Naked Smoky palette). However, limiting yourself to this color scheme would mean missing out on some seriously fierce beauty moments, says Wood. “Anything goes,” he explains. “It's more about technique than a color palette, so as long as you have the appropriate tones of a color (light, medium and dark versions of any shade) it can be achieved. My personal favorites and colors I have found to work on all skin tones are deep wine and burgundy tones, jewel-toned navy, rich chocolates and coppers, and traditional black.”
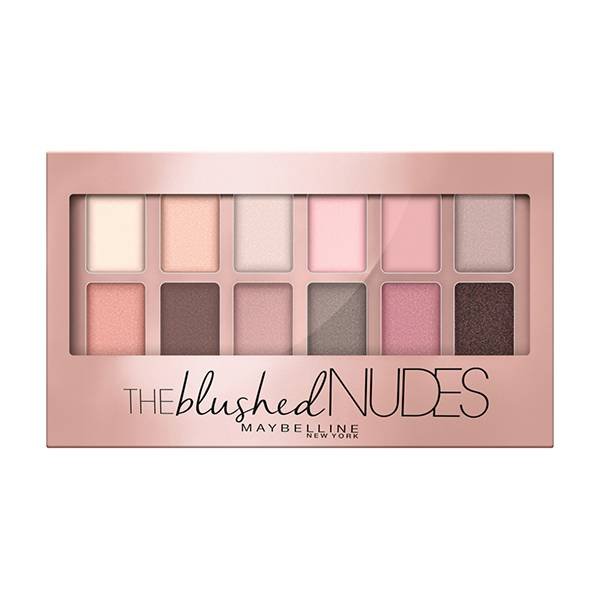
Heck, you can even go with lighter and brighter tones if you want, as long as “there is depth around the lash line and the eyes are elongated,” says Wood. Lam seconds that motion, stating, “You can definitely use light tones, for the people who don't feel 100-percent comfortable with full-on black eyeshadow.” Try Maybelline New York The Blushed Nudes.
One thing to note when choosing your color palette is to make sure you’re working with shades that complement your skin tone. “If you want your look to harmonize with your natural tone, follow these rules: Someone with warm-toned skin should opt for warmer shades, while someone with cool skin would opt for cool. In regards to depth, the deeper the skin tone, the more saturated the color should be as deeper skin will naturally absorb more color.”
You can use the same devil-may-care attitude when it comes to your shadow textures. Wood says he typically starts with a cream base (whether that be a long-wear cream shadow or a kohl pencil buffed out all over the lid), as this provides instant smokiness to the eye and allows you to use less shadow products. After that, he says, it’s anybody’s game. “I usually follow with matte eyeshadows to blend, define and further smoke out the eye. However, I love a mix of mattes/shimmers/glitters/sheens. I would only really apply the latter three textures on the inner eye and on the eyelid and never in the socket as this creates a very unflattering texture there.”
Also, Wood says shimmery shades will always be more enhanced on deeper skin tones, so lighter skin tones may need to opt for something ultra shiny to ensure the color shows true.
TIP 9: DON’T GO FOR PERFECTION
A solid, quintessential smoky eye is perfectly imperfect, so don’t get stuck on the details. Don’t get too sharp with the eyeliner or too sleek with the shadow. Embrace a slightly flawless, slept-in look. “For me, there is nothing sexier or indicative of a smoky eye than something that is smudgy, worn in and creased,” says Wood. “Pair that with an immaculate base and minimal makeup for the rest of your face and you have the ultimate smoky look.”
TIP 10: DON’T RUSH IT This rule is especially true if you’re going with a classic, rich smoky eye with deeper shades. The last thing you want is to haphazardly swipe jet-black shadow all over the eye area up to your brow arch...not a good look. “I definitely avoid doing a smoky eye in a rush, that never works,” says Lam. “You need time to blend everything and perfect the shape.” If you know you want to rock the smoke in advance, give yourself a 10-15 minute window to blend, shape and clean up any mistakes or fallout.