


.jpg?cx=0.5&cy=0.5&cw=150&ch=120&blr=False&hash=13DE8EDEE0E1AF98CC5D704B05EC64EE)


The Correct Order to Apply Your Makeup (Because There Is a Right Way!)
February 24, 2023

Is there a right order to apply your makeup? That may be one of the oldest questions in the beauty book. Even among professional makeup artists, it’s a much debated topic and people tend to feel strongly about their preferred order. There's no hard-and-fast rule when it comes to your beauty routine (after all, different things work for different people!) — but there are some general guidelines you can follow.
If you don’t have a set order in which you apply your makeup, we've come up with an easy-to-follow checklist so you can make sure you’ve covered all of your bases.
The Right Order to Apply Makeup
Step 1: Prep With Primer
Before anything else, always start with a primer. This step is key because it creates a clean, smooth base for the rest of your makeup and will help the rest of the products stay put longer.
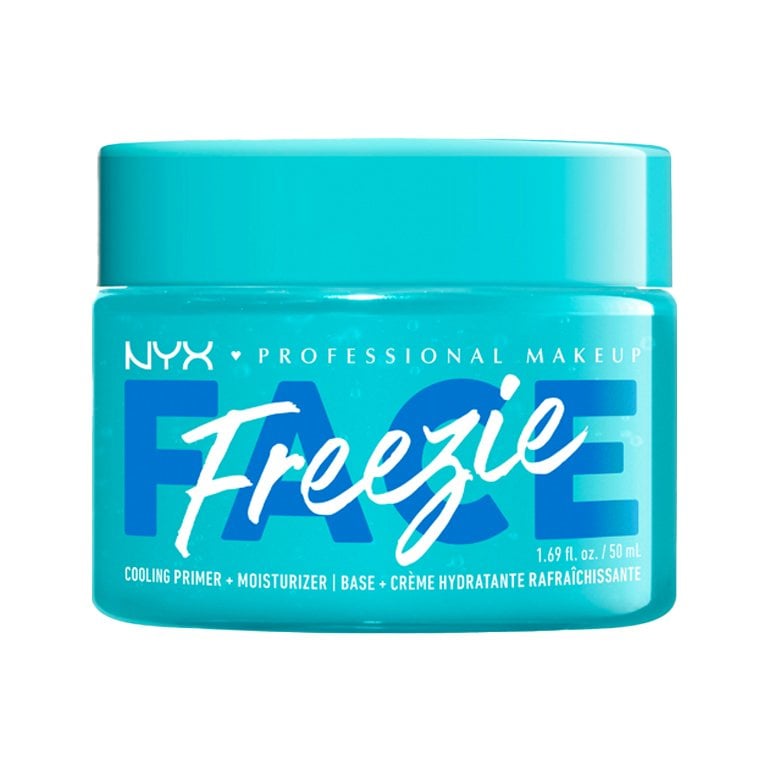
NYX Professional Makeup Face Freezie Cooling Primer + Moisturizer
Introducing: the innovative, multitasking primer your skin prep routine has been missing. The NYX Professional Makeup Face Freezie Cooling Primer + Moisturizer hydrates, smooths, tightens and sculpts your skin. It gives your skin a fresh, dewy look, so you can wear it alone on no makeup days, as well as use it as a primer before you go full glam.
Valentino Beauty V-Lighter Face Base Primer and Highlighter
If you like the look of a glowy, radiant complexion (as opposed to matte makeup), you’ll love the Valentino Beauty V-Lighter Face Base Primer and Highlighter. You can wear this primer under your makeup, but you can also use it as a highlighter on top of your face makeup to add a little extra glow.

Step 2: Fill Your Brows
After primer, you want to focus on your eye area. Shape and fill in your eyebrows first — it will help serve as a guide when you're applying eyeshadow. If you’re a beginner, try an easy-to-use pencil like NYX Professional Makeup Micro Brow Pencil and create hair-like strokes in the sparse areas of your brows.
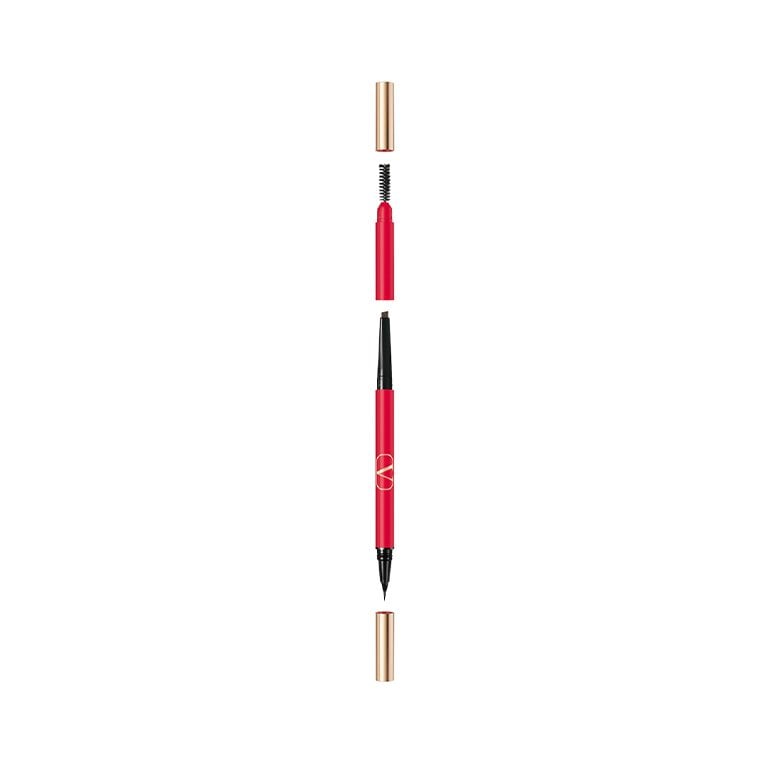
Valentino Beauty Trio Eyebrow Liner
The Valentino Beauty Trio Eyebrow Liner is three handy brow tools in one. Start by using the brow brush to shape and fluff your eyebrows, whether you are going for a full, brushed-up vibe or a thinner, throwback look. Next, you’ll take the pencil to your brows to fill them in. Finally, the liquid liner allows you to fill in your brows with realistic, hair-like strokes.
Trio Beauty Microfill Brow Pencil
Fill in your brows in a way that looks natural and realistic with the Trip Beauty Microfill Brow Pencil. It comes in five shades, so you can find the color that best matches your hair color. The pigment is buildable, allowing you to customize your look depending on how full a brow you like.

Step 3: Apply Your Eyeshadow
Next, we recommend applying your eyeshadow before the rest of your makeup in case you experience any fallout. The last thing you want to do is mess up your perfectly contoured face, right? The ideal eyeshadow breakdown goes like this: lid shade first, followed by crease color and finally highlighter along your brow bone and on the inner corner of your eyes.
For a palette that will meet all of your eyeshadow needs and fits in your bag for touch-ups, try a versatile option like the Urban Decay Naked Half-Baked Mini Eyeshadow Palette. It’s full of warm, flattering neutrals that are easy to blend and transition from day to night.
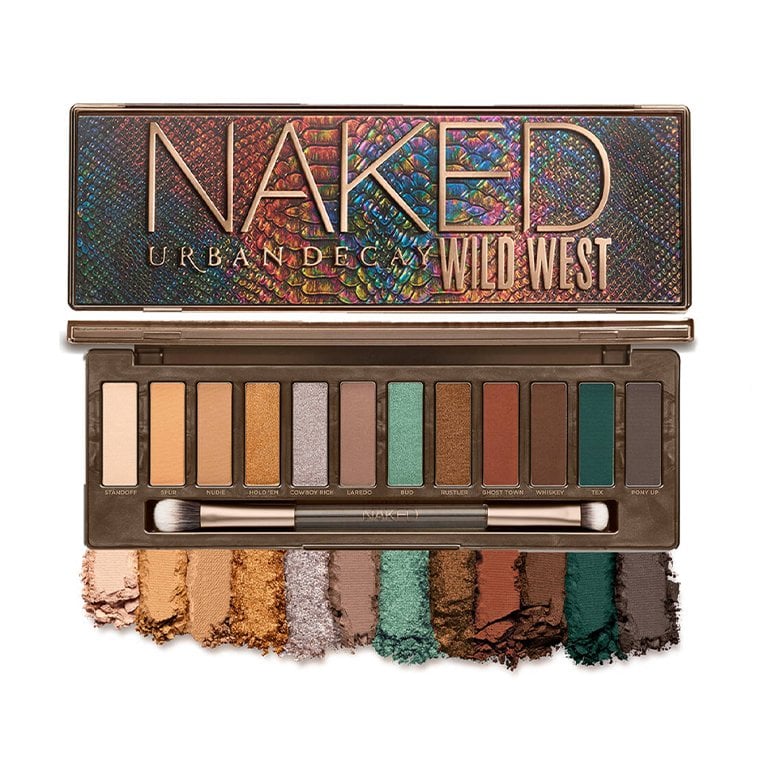
Urban Decay Wild West Palette
For a larger palette with more shade options, check out the Urban Decay Wild West Palette. The greens on this palette are trendy and fun for when you feel like experimenting with more playful looks.
Maybelline New York Shadow Blocks
Another pocket-sized palette, the Maybelline New York Shadow Blocks each come with three stunning, complementary shades. For a fun going out vibe, we like the bold purples of Broadway & Prince St.

Step 4: Apply Eyeliner
Eyeliner is much easier to apply when your lashes are bare, so do your liner after eyeshadow but before mascara. If you want to go for a full, bold wing, try the Lancôme Idôle Liner, an inky felt tip that glides on easily and lasts for up to 24 hours. In addition to classic black, this eyeliner comes in brown, gray, blue and green colorways.
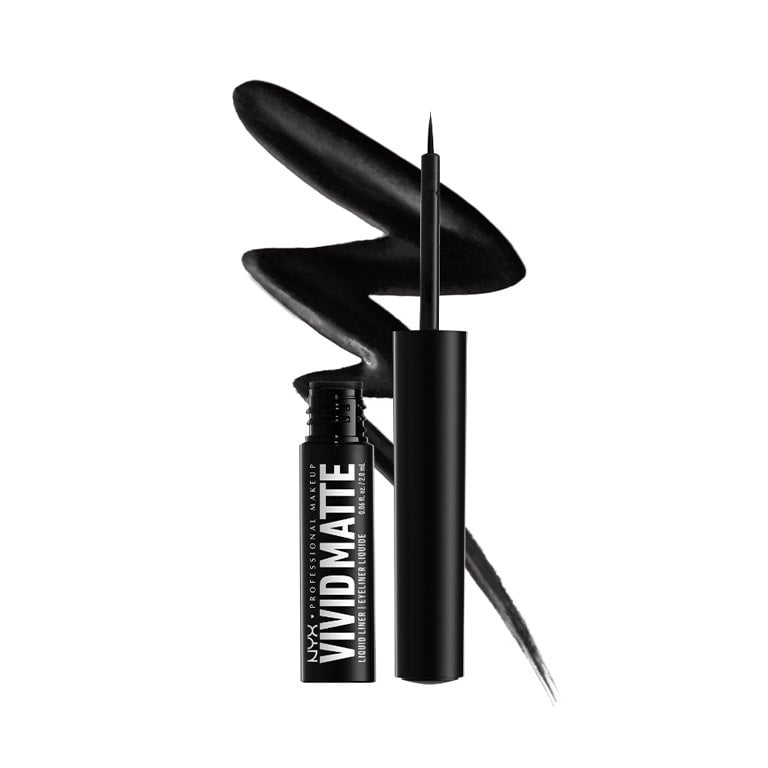
NYX Professional Makeup Vivid Matte Liquid Liner
If you’re looking for a more budget-friendly liquid eyeliner, opt for the NYX Professional Makeup Vivid Matte Liquid Liner. This striking black eyeliner is perfect for creating dramatic wings and cat eyes.
Step 5: Finish Off the Eyes With Mascara
While the mascara you choose largely depends on the desired final look, such as whether you want long, separated lashes or a full, feathery lash line. But regardless of which you choose, be sure to wait a few moments until you move on to the rest of your routine so the mascara dries completely.
L’Oréal Paris Telescopic Lift Mascara
You’ll be amazed by the amped-up length of your lashes after swiping on a couple of coats of L’Oréal’s iconic Telescopic Lift Mascara. It lifts your eyelashes to give you a gorgeous wide-eyed look. Don’t be surprised when people start asking you if you got lash extensions.

Step 6: Move onto Foundation
Foundation should almost always be applied after your eye makeup, especially if you’re doing a smoky shadow look. The Giorgio Armani Beauty Luminous Silk Foundation is one of our favorites for a radiant, lightweight finish and medium coverage.
YSL Beauty All Hours Foundation
Formulated with hyaluronic acid, the YSL Beauty All Hours Foundation is anything but drying. In fact, it hydrates and softens your skin as you wear it. It has a matte finish, but it still feels weightless and looks natural.

Step 7: Conceal Your Under-Eyes
Next, apply concealer under your eyes and over any blemishes. Foundation does a good job of covering up, but concealer can target any stubborn spots and make them nearly non-existent. For a full-coverage option, try Maybelline New York Super Stay Concealer, a buildable formula with a skin-like finish.
Step 8: Add Dimension to Your Face With Contour or Bronzer
Whether you choose to do a full-on contour or just opt to warm up the skin, applying bronzer can help create definition and a sun-kissed glow.
To do this, apply a contour or bronzer product on the areas of your face where you want to create shadows. Common areas to use contour makeup include the cheeks, jaw, nose and forehead.
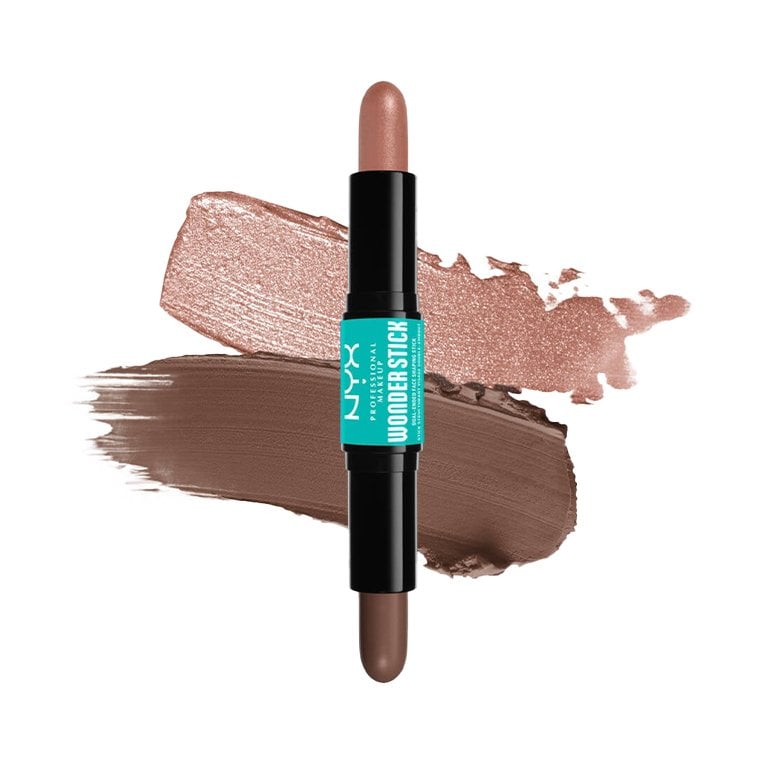
NYX Professional Makeup Wonder Stick Contour and Highlighter Stick
We adore the NYX Professional Makeup Wonder Stick Contour and Highlighter Stick for its convenience. It has both products you need to achieve a stunning, sculpted contour in one double-ended pencil, and it’s easy to toss in your bag for on-the-go touch-ups.
Step 9: Make Your Cheeks Rosy with Blush
There are lots of ways to apply blush but two things are key: blending and choosing the right blush.
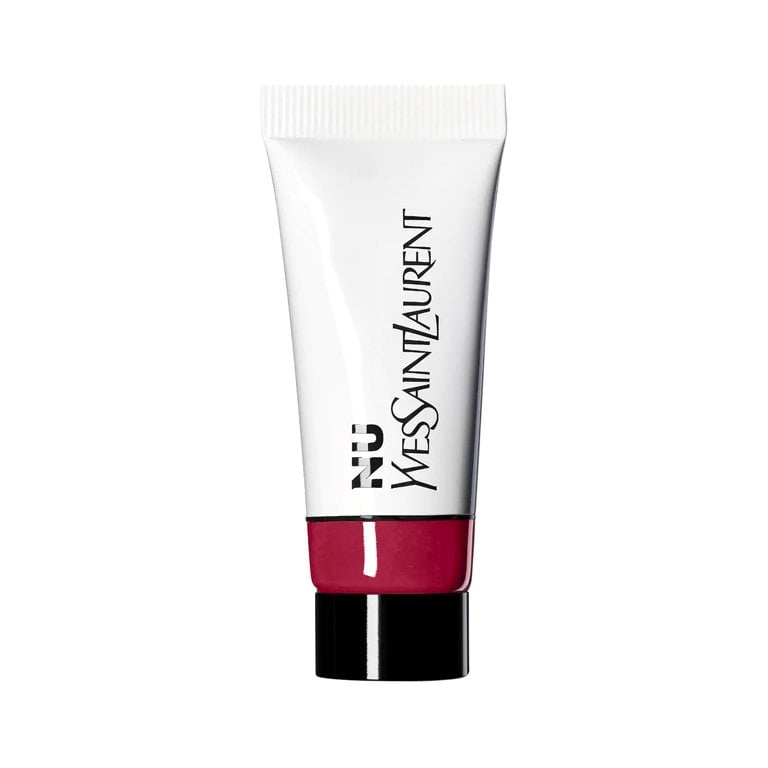
YSL Beauty Nu Lip & Cheek Balmy Tint
A cream blush like the YSL Beauty Nu Lip & Cheek Balmy Tint is a great way to give your complexion a subtle, natural-looking flush. You’ll love how the sheer, buildable color melts seamlessly into your skin.
Juvia’s Place The Saharan Vol. II Blush Palette
If you can’t make up your mind on which color of blush you want, try a product with lots of shade options like Juvia’s Place The Saharan Vol. II Palette, so you can mix and match to find the perfect shade for you.

Step 10: Apply Highlighter
Highlighter is the final step to your face makeup. Apply it to your cheekbones,the bridge of your nose and anywhere else natural light usually reflects. The kind of highlighter you reach for is really up to you. Try a liquid formula for dewy, natural finish or something with lots of shimmer for a bold sheen.
Jones Road Beauty Miracle Balm
The Jones Road Beauty Miracle Balm is a versatile makeup product that works as a subtle, natural-looking highlighter. There are nine shades, and some of them function as shimmery skin tints that can be used as blush or bronzer, too.

Step 11: Add Your Favorite Lipstick
Lipstick or gloss should be one of the very last steps, since you don't want it to smudge while you’re trying to do the rest of your makeup. To make sure it stays defined and locked in place all day, don't forget to start with a lip liner.
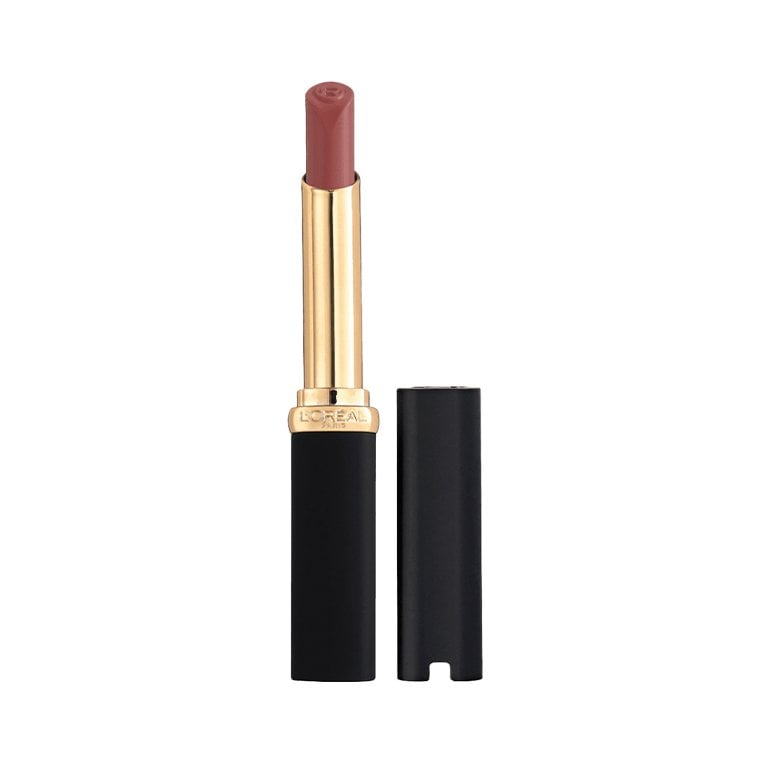
L’Oréal Paris Colour Riche Intense Volume Matte Lipstick
For rich pigment payoff that will last all day and night, we love the L’Oréal Paris Colour Riche Intense Volume Matte Lipstick. This gorgeous matte lippie comes in 12 pretty red, pink and nude shades.
Charlotte Tilbury Pillow Talk Lip Cheat Lip Liner
The Charlotte Tilbury Pillow Talk Lip Cheat Lip Liner has a cult following for a reason. It’s the perfect dynamic, rosy pink shade that pairs well with tons of different lipsticks and glosses. Plus, it’s creamy and glides on effortlessly.

Step 12: Spritz on Setting Spray
Finally, the last step! Spritz on a setting spray, like the Urban Decay All Nighter Vitamin C Setting Spray, all over your face to help your makeup last all day.
Additional Reporting: Jordan Julian, Photo: Chaunte Vaughn