


.jpg?cx=0.5&cy=0.5&cw=150&ch=120&blr=False&hash=13DE8EDEE0E1AF98CC5D704B05EC64EE)


This Halloween Lion King Makeup Tutorial Is Giving Us All the Hakuna Matata Vibes
September 26, 2019

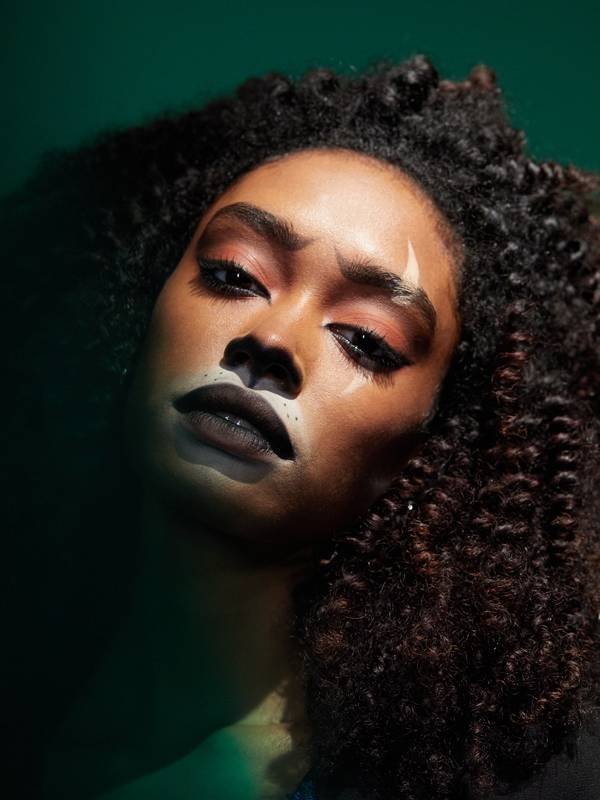
Re-creating a character for Halloween using makeup is one of our favorite pastimes each year, and this spooky szn, we’re sharing our take on the proclaimed villain, Scar from the Lion King. Inspired by the movie’s SFX and live-action allure, we traded in our typical cat-eye for a realistic, menacing lion look using products you can find at your local Halloween shop or in your vanity. Be prepared, because here’s how to get the antihero’s look.
STEP 1: Create Your Lion’s Mouth
After prepping, priming and applying foundation to your face, the makeup look really begins with re-creating a lion’s mouth at the base of your face. Start with a small, rounded brush and buff out Mehron Clown White in a circle around your mouth, on your chin, and slightly pulled out onto each side of your cheek. To set, take the same brush and dip it in a finely-milled white NYX Professional Makeup SFX Setting Powder to complete your mouth’s shape and ensure it lasts all night.
STEP 2: Fill in Your Nose
With a small, flat eye brush, pick up the NYX Professional Makeup SFX Crème Colour in Black and trace and fill in your nose along the outside of your nostrils, extending a line down over your Cupid’s bow. Make sure to buff out the top of the nose lines so they seamlessly blend into your natural nose.
STEP 3: Add Your Whiskers
Next, use the liquid side of the NYX Professional Makeup Two Timer Dual Ended Eyeliner to dot on your whiskers below each nostril.
STEP 4: Apply Sunken Eyeshadow
To prep for your cat-eye, sunken and hollow-looking eyeshadow is key. Start by applying the NYX Professional Makeup Nude Matte Shadow in Frisky all over the lid with a flat shadow brush. Next, buff Haywire into the crease, winging it out on each tail end of the eye to create a outer-V shape. This will serve as the background of your lion liner.
STEP 6: Create Your Cat Eyes
Using the NYX Professional Makeup Two Timer Dual Ended Eyeliner, use the pencil side to glide along the upper lash line, starting from the very inner corner of the eye to the outer. To nail down that perfect cat-shape, you want to make sure you curve the liner downward by your inner corner and wing it out in a very upward motion on your outer. Next, connect the two lines while you fill in your lower lash line.
STEP 7: Apply Mascara
To complete the eyes, apply a coat of the NYX Professional Makeup On The Rise Liftscara for a lifted, wide-eyed finish.
STEP 8: Draw on Your Scar
Draw on and fill in a thick, curved scar over the top and bottom portion of your left eye with the NYX Professional Makeup Gotcha Covered Concealer Pencil. Go in with a Q-tip to clean up excess smudges or lines and strengthen the shape.
STEP 9: Reshape Your Brows
To mimic the villain cat’s furrowed brow, go in with the NYX Professional Makeup Fill & Fluff Eyebrow Pomade Pencil and change the shape of your brow, add a strong upward curve to the start of each brow.
STEP 10: Darken Your Lips
Every lion needs a defined pout to complete their look, so with another flat brush, pack on the NYX Professional Makeup SFX Crème Colour in Black over your lips. Start by lining the upper portions of both the top and bottom lip and softly add gradient to the color out as you reach the bottoms.