


.jpg?cx=0.5&cy=0.5&cw=150&ch=120&blr=False&hash=13DE8EDEE0E1AF98CC5D704B05EC64EE)


How to DIY a Salon-Like Pedicure at Home
November 10, 2022

We can’t think of many more relaxing pastimes than giving ourselves DIY spa treatments. From incorporating gua sha and facials into our skincare practice to taking the time to paint, buff and file our nails, sometimes a self-care day is the reset everyone craves. The luxury of going to the salon is nice, but you can save money, indulge in self-care and spend time in the privacy of your own home when you give yourself a DIY pedicure. Plus, there’s no need to rush to choose your nail polish shade!
To find out how to achieve a salon-quality pedicure at home, we spoke to Skyy Hadley, owner of As U Wish Spa in Hoboken, New Jersey, and Tina Wang, owner of Lunula Salon in Brooklyn, New York. Below, find out all the supplies you need and the steps both manicurists recommend for a professional-looking pedicure.
What Do I Need for a DIY Pedicure?
Before you get started, make sure to gather all the supplies you’ll need for your relaxing pedicure. We suggest the following: nail polish remover, cotton pads, soap (and a tub filled with water!), a foot file for calluses, a nail file, cuticle oil, a moisturizer, toe separators, a nail polish base coat, a nail polish of your choosing and a top coat.
How to DIY a Salon-Like Pedicure at Home in 10 Steps
Step 1: Remove Old Nail Polish
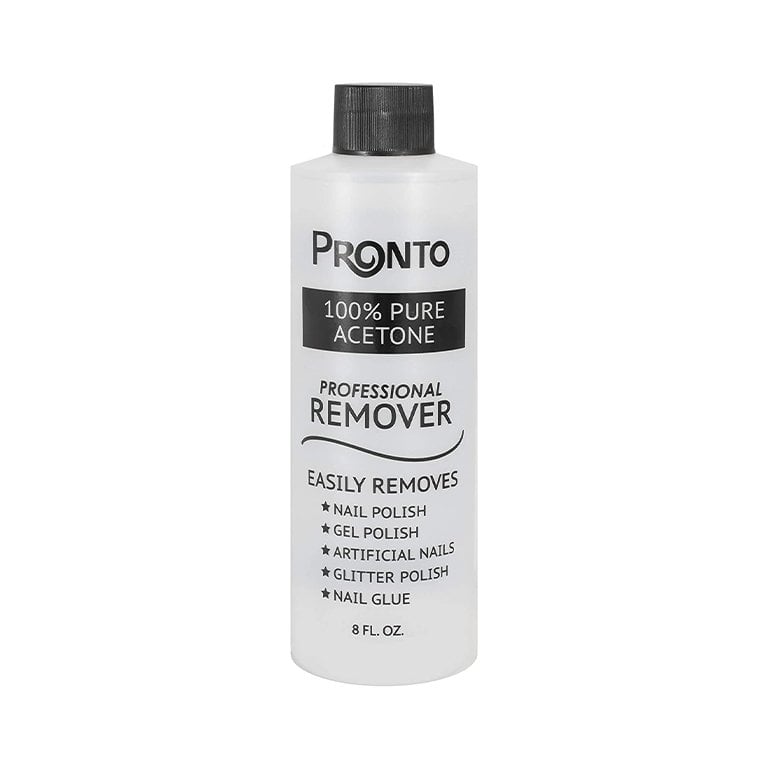
Completely remove any nail polish that’s still on your nails using nail polish remover and a cotton pad. If you don’t have any leftover polish, you should still run nail polish remover over your nails to remove any excess oil on the nail bed. If you previously had a gel color on your toes, you’ll need to use a 100% acetone remover to get rid of the residue — use this gel nail polish removal guide from a professional nail tech to help you.
Step 2: Soak Your Feet Like You’re at the Spa
For a DIY foot soak, fill your tub with warm water and soap (body wash will do!), and let your feet soak for 15 minutes. “Oftentimes, people like to jump to the scrub and pampering, but we always feel it's important to begin foot care service with a thorough cleanse,” says Wang. “A foot cleaning ritual is quite therapeutic when done intentionally with an aromatic cleanser.” But, she notes that if you’re planning to apply polish, you should limit the amount of time your feet soak — too much water exposure can expand the nails and lead to more frequent chipping.
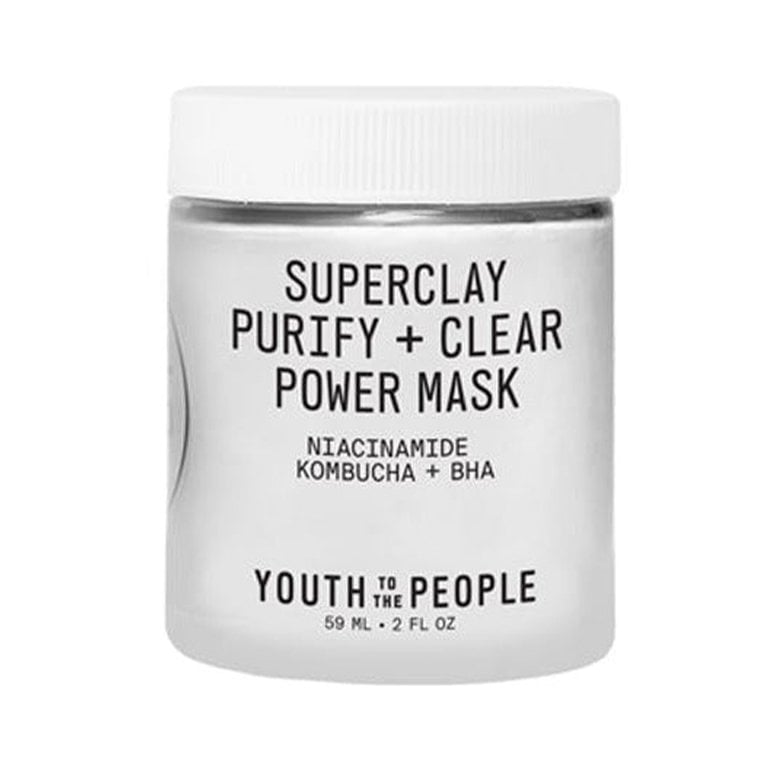
Pro tip: While you’re in rest and relaxation mode, break out a face mask. We love the Youth to the People Superclay Purify + Clear Power Mask because it fights blackheads and sucks out any grime and gunk from our pores.
Step 3: Get Rid of Dead Skin
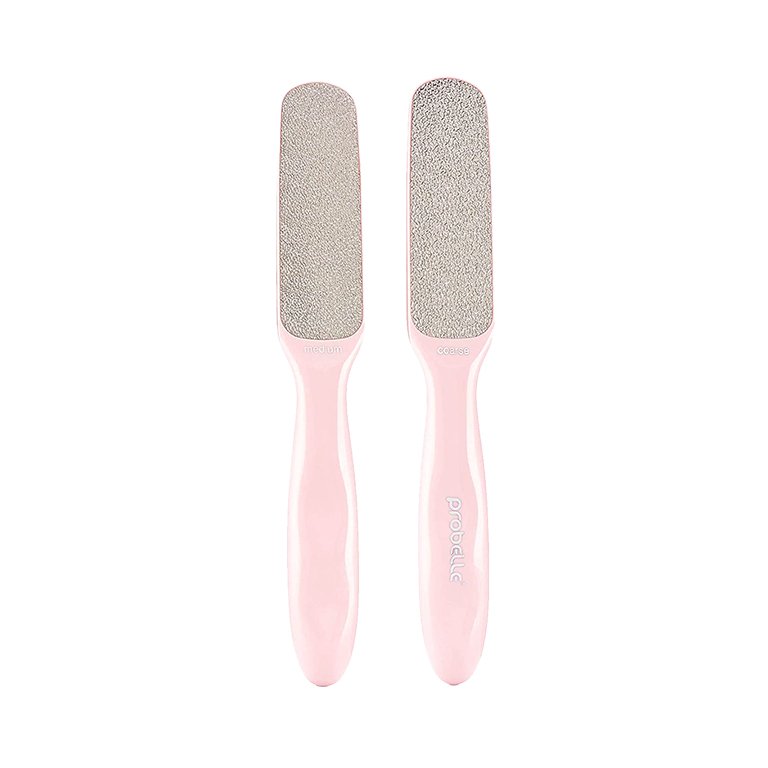
After drying off your feet, use a foot file to remove any dead skin from calloused areas. We recommend this highly rated file from Amazon. Pay attention to the balls of your feet, the sides of your feet and your heels. Scrape these areas until they feel smooth, but don’t overdo it — you could end up causing irritation. “It's important to realize that our calluses are there to protect our feet, especially for runners, so be careful with pumice stones and any over-zealous foot exfoliation and scraping,” says Wang. “When in doubt, leave the callus removal to professionals; your trusted neighborhood nail salon will know the appropriate level of dead skin to remove.”
Step 4: File and Shape Your Nails
Use a nail clipper specifically for toes (not fingernail clippers, Wang notes) to achieve the length and shape you want. We recommend cutting straight across and then going in with a nail file to buff out the corners. “For runners and those who are active on their feet for work, we encourage a square toenail shape, which helps prevent the formation of ingrown toenails,” says Wang.
According to Hadley, a big mistake people make is cutting their cuticles. “Trimming or cutting cuticles during a mani or pedi is purely cosmetic, and sometimes it doesn’t benefit the nail in any way,” says Hadley. “The cuticle is a barrier to protect your surrounding skin and protect against infection.”
Wang adds that cuticles can dry out over time from being exposed to things like cold, harsh chemicals and soapy water. This, in turn, weakens that protective barrier.
If you’d like to remove your cuticles without cutting them, use a gentle formula like the Olive & June Cuticle Remover to melt them away.

Step 5: Apply Cuticle Oil
Apply cuticle oil, like the Essie Apricot Cuticle Oil, to the base of your nail. “Cuticle oil doesn’t just keep your feet soft and moisturized, but it also keeps your polish from chipping,” says Hadley. To keep your pedicure looking salon-fresh, you can massage this cuticle oil on every day until your next polish change.
“The best time to apply cuticle oil is right after water exposure, up to three times a day,” says Wang. “Just one drop on each digit should do it.”

Step 6: Moisturize
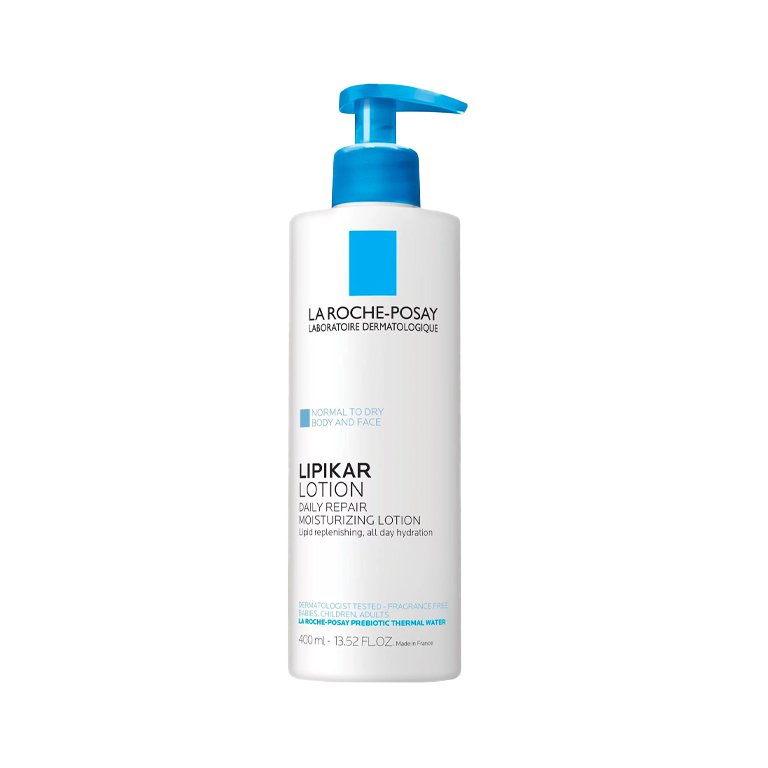
Moisturize your feet with an unscented lotion to keep the skin hydrated and smooth. “Scented lotions with synthetic fragrances can cause your nail polish to crack,” cautions Hadley. We love the La Roche-Posay Lipikar Body Lotion for Normal to Dry Skin for this step. It’s super gentle, making it ideal for even ultra sensitive and eczema-prone skin types. Packed with glycerin and niacinamide, it soothes and comforts dry skin.
Step 7: Prep Your Toes
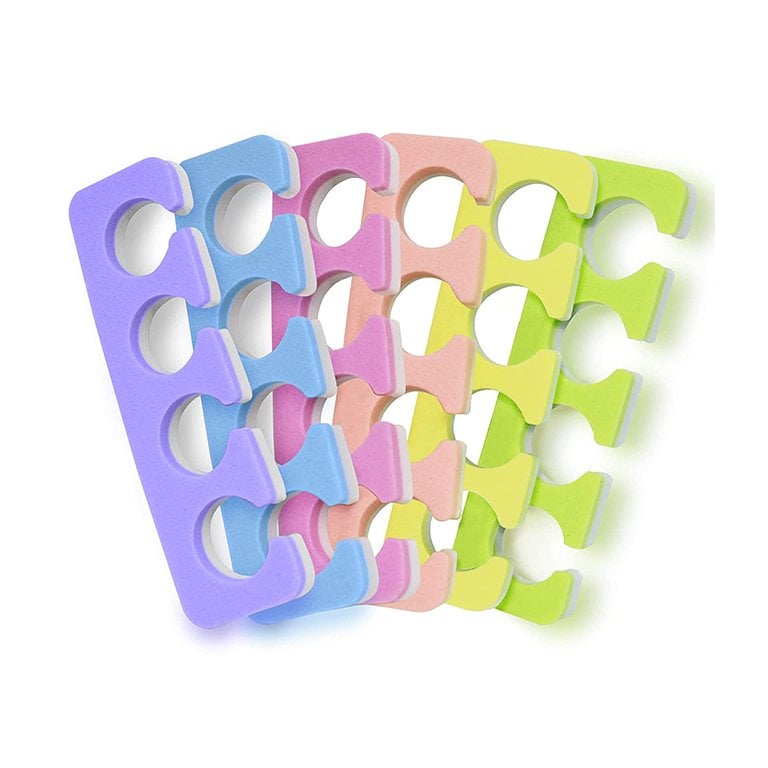
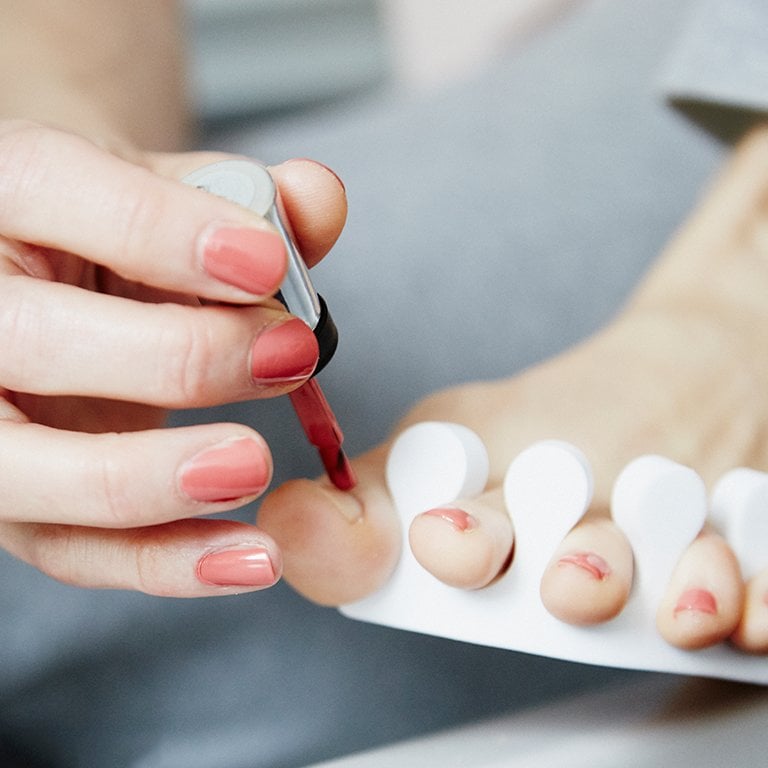
Use toe separators to make painting your toes easier and avoid making a mess. We like this 12-pack from Amazon because it costs less than $10 — plus, each set is washable and reusable, should you start indulging in at-home pedicures more frequently.
Step 8: Apply Your Base Coat
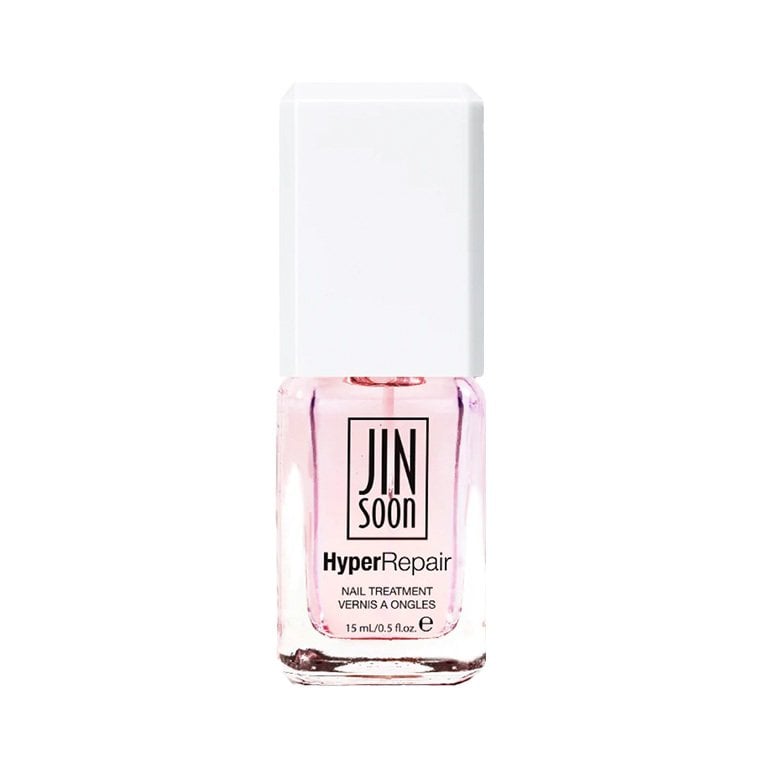
“Don’t forget your base coat because it gives your nail polish something to sink into besides your actual nails,” says Hadley. We recommend the JINsoon HyperRepair Nourishing & Strengthening Nail Base Coat. This base coat promotes nail health in just two uses thanks to a blend of AHAs and antioxidants, which help restore and hydrate your nail beds. After about two minutes, the base coat should be dry. Then, you’re ready to go in with a color.
Step 9: Apply Your Nail Polish
Apply two to three coats of nail polish, making sure each coat has dried before applying the next. “Thick polish coats will result in clumps, takes longer to dry, and increases likelihood of chipping, so use thin coats for every additional layer,” says Wang. As for polish colors, we always love Essie Mademoiselle, a classic sheer pink, but if you’re in a bold mood, go for a fiery reddish-orange like Essie Risk-Takers Only.
Not sure how to paint your nails like a pro? Try the three-swipe method. “At Lunula, our team swears by the ‘three-stripe’ method when applying polish,” says Wang. “We start by making one smooth motion and moving the brush across the center of the nail from [the] cuticle to the edge of the nail. Then repeat the motion on the left side of the nail. Then repeat the motion on the right side of the nail. This method ensures you will get an even coat across the entire nail, no more, no less.” To perfect the three-swipe method, make sure to remove any excess polish before you start painting — if you hold up the nail polish brush and it drips, wipe it on the side of your nail polish bottle.
Note that if you’re using a nontoxic nail polish, you need to be extra careful about letting each coat dry. “Since nontoxic polish doesn’t contain harsh drying agents that help polish dry quickly, it can sometimes take longer to dry,” says Wang. “Be vigilant to ensure polish layers are thin and even, including the base coat.”
If you make a mistake when painting your nails, try not to worry too much. This guide will help you find easy ways to disguise an accidental nail polish smudge.

Step 9: Add a Quick-Drying Top Coat
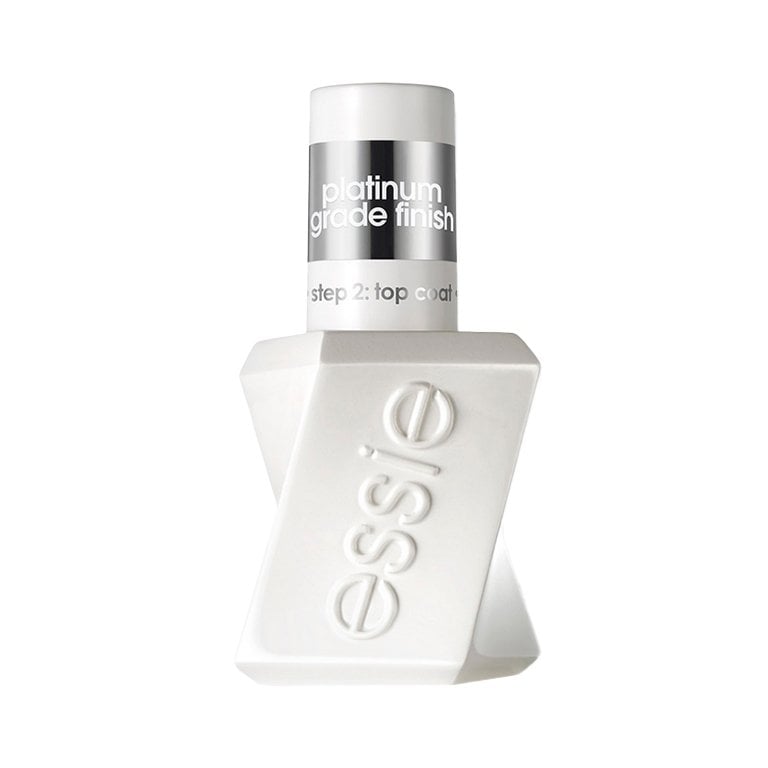
Finish with a top coat so your nails can maintain high shine and luster. We like the Essie Gel Couture Top Coat because it helps regular nail colors last for up to two weeks. Because nail polish takes about 12 hours to fully harden, Hadley recommends sticking your feet in cold water for a few minutes to help your nail polish solidify more quickly.
Step 10: Finish With More Lotion and Cuticle Oil
If you do submerge your feet in water, make sure to rehydrate them with another layer of moisturizer and cuticle oil. This will keep your feet looking soft and feeling velvety smooth.
Additional reporting by Ariel Wodarcyk. Photos: Getty Images