How to Create Two 2023 Brow Trends With Just 2 Brow Products
October 02, 2023
Brow makeup is a vital part of any makeup routine — and if it’s not something you’ve experimented with yet, what’s stopping you? There are endless ways to define and shape your brow hairs that’ll complement your makeup look, or stand out for a statement eyebrow moment.
There’s the over-plucked look of a thin ‘90s brow, the sheen of laminated brows, bleached brows perfected by the Gen Z beauty-obsessed, square brows, colored brows and many more shapes yet to come. If you’re interested in a new brow look or just want to see how to create multiple brow trends with the same brow products, keep reading for two editor-approved eyebrow makeup moments that you’ll want to recreate on your own. In honor of National Brow Day, see how this beauty editor quickly creates the TikTok-loved laminated brow and fluffy feathered brow looks with the same two products.
First: The Brow Products
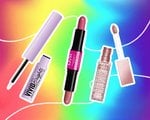
NYX Professional Makeup Lift & Snatch! Brow Tint Pen
This brow pen has been a staple in my makeup routine since I first tried it in 2021 — fast-forward a few years later and I’ve repurchased it six times. I always stock up during NYX Professional Makeup’s holiday sales and am eager to recommend the Lift & Snatch! Brow Tint Pen to anyone who will listen ˆt’s just that good. This brow product has a sharp felt tip that doesn’t fray and makes it easy to create thin or thick, brow-like hairs without smudging. You can use this brow product for any trend — from skinny ‘90s brows to perfectly shaped ‘80s brows — thanks to its transfer-resistant and buildable formula.
You can choose from 10 shades of blonde, auburn, black and brunette that willcomplement your brow color for a natural look. Before using this brow pen, shake the product (with the cap on) to prepare the miro-tip to fill in sparse areas and define your brow shape. You can play around with how you use this pen without fear of an inky color getting everywhere. The semi-sheer finish allows you to build hair-like coverage without making your brows look blocky or unnatural. (And if you are into block brows, just swipe a few layers of this brow pen onto hairs and you’re good to go). Once you’re done, the brow tint dries matte and offers up to 16 hours of smudge-free wear.

NYX Professional Makeup The Brow Glue Instant Brow Styler
After trying this Brow Glue in the Medium Brown shade, I quickly ditched my other brow gels and brow mascaras. The transfer-proof formula sticks to my thick hairs and deposits a touch of color that fills in sparse areas without creating clumps. You can easily brush through thin and thick brow hairs for a defined look that takes only a few minutes in the mirror. Use this brow gel as a base to lock your brows in place all day, , and continue with a brow pen or brow pencil to further your look — let it rock as is. Either will create a compliment-worthy brow moment that you’ll want to snap a few pics of for social media.
Second: The Brow Looks
Start either of the brow trends listed below with the same preparation steps. Most brow looks begin the same (with clean, brushed-out brows) since it’s the best base for brow makeup.
Step 1: Clean Your Brows
Make sure your brow hairs are clean from any sweat, oil, dirt or product buildup that may disturb the look you’re trying to create. You should consider washing your face before starting your makeup anyway, but if your brows need some extra TLC, use makeup remover wipes like the NYX Professional Makeup Be Gone! Makeup Remover Wipes to fully clear brow hairs of any residue.
Step 2: Brush Your Brows
With any brow look, you’ll want to brush your brows so they’re going in the same direction. Use a spoolie brush to comb your brows, making sure any tangled hairs are separated. If you have thicker brow hairs, you may notice some resistance to this step, so just comb the hairs up a bit — the brow gel will do most of the work.
Step 3: Grab Your Brow Makeup
For these looks, you’ll want to use a brow pen like the NYX Professional Makeup Lift & Snatch! Brow Tint Pen and a brow gel like the NYX Professional Makeup The Brow Glue Instant Brow Styler.
How to Create A Fluffy Brow With Eyebrow Makeup
Keeping in mind steps one and three above, continue your brow makeup with the steps below for a laminated brow.
Step 1: Shape Brows With Brow Gel
Start with a little bit of brow gel at the root of the brow before combing hairs up completely. With the rounded spoolie, comb your brows in the desired shape, keeping in mind that a natural brow look is all about flat, individualized hairs. You don’t want to coat the hairs in too much product, as this could cause your brows to clump together.
Step 2: Fill in Sparse Areas With Brow Tint Pen
Using the NYX Professional Makeup brow pen from above, follow the direction of your natural brow hairs to fill in empty spaces. The brow pen allows you to build color and thickness to mimic your individual brow hairs. You don’t need to go overboard with the pen — just draw on light, hair-like strokes wherever your brows appear sparse.
Step 3: Enjoy!
Remember, your brows are siblings, not twins. It’s okay if one shape doesn’t look the exact same as the other! When you’re done, your brows should have a semi-shine and thick, voluminous texture.
How to Create A Laminated Brow With Eye Makeup
Keeping in mind steps one and three from above, continue your brow makeup with the below steps for a fluffy brow.
Step 1: Fill in Sparse Areas With Brow Tint Pen
After letting your brows dry for a few seconds, fill in any empty spaces with the previously mentioned brow pen. Use soft strokes to mimic hairs in sparse areas and build up the color for the appearance of thicker brows.
Step 2: Shape Brows With Brow Gel
Using the aforementioned brow styler, apply thegel at the root of your brow hairs and brush the spoolie up to coat the hairs. Make sure to work quickly to shape hairs before the gel styler dries.
As you coat the hairs with the gel, gently brush the hairs following the natural shape of your eyebrows. This will create the soft, fluffy look popular with this trend. Finish by tapering the tails of your brows using the spoolie brush for a sharp line.
Step 3. Enjoy!
Makeup isn’t easy and it’s okay if you need to try again. Just clean off your brows with a makeup remover wipe and start over. A laminated brow look at home is possible with a few simple steps and some initial patience. When you’ve completed your brows in the desired shape, you’re ready to go and show the world your DIY eyebrow lamination.


.jpg?cx=0.5&cy=0.5&cw=150&ch=120&blr=False&hash=13DE8EDEE0E1AF98CC5D704B05EC64EE)


