


.jpg?cx=0.5&cy=0.5&cw=150&ch=120&blr=False&hash=13DE8EDEE0E1AF98CC5D704B05EC64EE)


Glitter Tears Are All Over Insta — Here’s How to Get the Look at Home
February 10, 2020

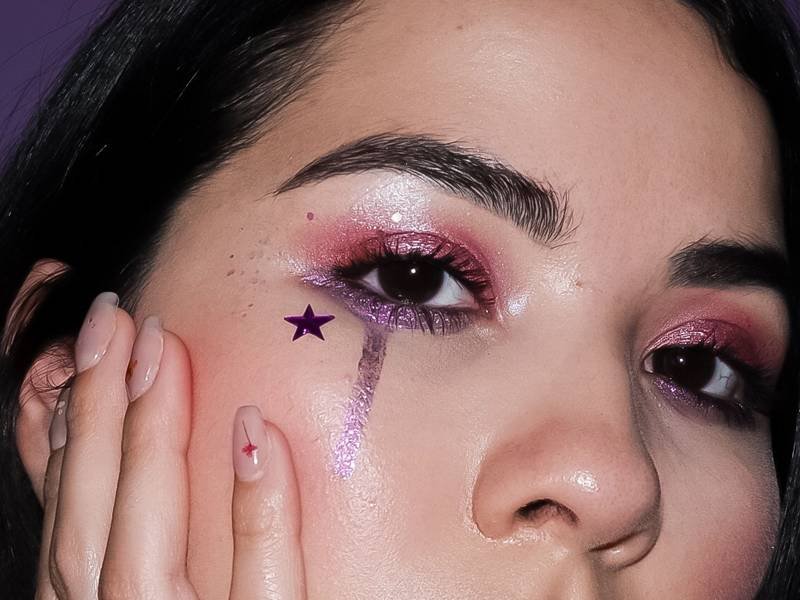
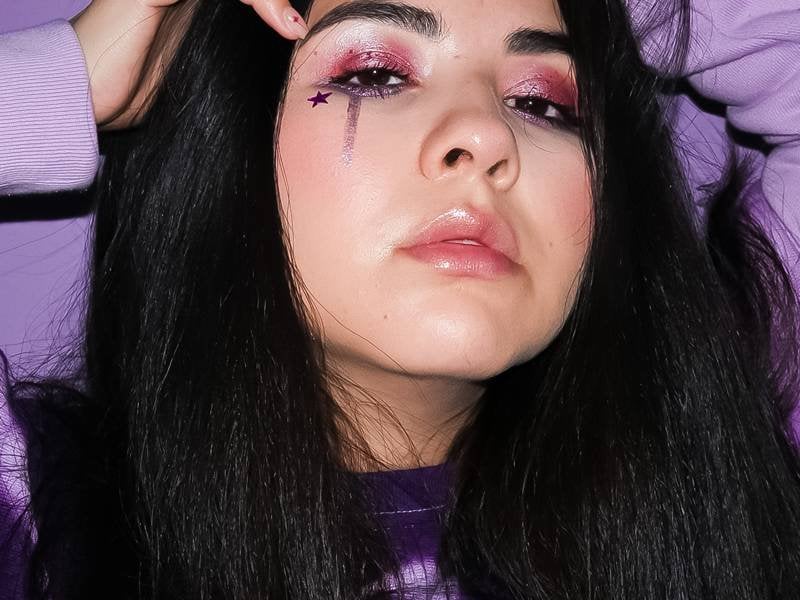
When there’s a new glitter trend on the makeup scene, we’re automatically on-board. We like our sparkle, okay? The second that glitter tears, which basically look like you’re crying sparkle from your eyes, started taking over the ’gram, we couldn’t wait to recreate the glittery, shimmery and sparkly beat, STAT. While we were definitely into the look, we were still slightly confused. Seriously, how does glitter not get everywhere?! Determined to find out how to achieve the fantasy-esque vibe, we turned to makeup artist Hannah Hatcher for guidance. Ahead, find a step-by-step tutorial for a mermaid tears eyeshadow look.
GLITTER TEARS STEP #1: Do Your Makeup as Usual
First things first, pick your eyeshadow. While we’re not creating the actual glitter tears just yet, you’re going to want to match your tears to your eyeshadow, so pick colors according. We like going bright and bold for this look — it’s perfect for festival szn. Our go-to is the Urban Decay Born to Run palette. Once your eyeshadow is complete, move on to your base. Apply your foundation, concealer and contour — you know the drill. Just hold off on any eyeliner or mascara.
GLITTER TEARS STEP #2: Sketch Out Your Tears
Crying pretty does not come naturally (we speak from experience). To make sure your glitter tears fall in just the right location, sketch an outline on your cheek. “The tears are an extension of your shadow,” says Hatcher. “Using a small brush, either a liner brush or a very small shadow brush, begin to sketch the tears with the same shadow you used on your eyes.” She explains that a lighter shade of eyeshadow will allow the glitter to really pop. If you’re using chunky glitter, though, feel free to go as deep and intense with your eyeshadow as you wish. “Begin by sketching directly under the eye and have the tears cascade down your cheek in a realistic, asymmetrical shape.”
GLITTER TEARS STEP #3: Glitter Up Your Skin
Don’t go piling glitter onto your face just yet. In order to minimize fallout and ensure the glitter tears stay put, it’s important to apply product that will keep the glitter in place. “If you are going for more subtle glitter tears, use setting spray on a brush and use a small shimmery glitter to fill in your template,” says Hatcher. “If you want more drama with larger glitter size, dip your brush into clear drying lash glue adhesive before applying sparkle.” Make sure you do this carefully and avoid getting any product in your eye. An alternative option? Hatcher says a hydrating skin serum that stays tacky on the skin can get the job done, too.
GLITTER TEARS STEP #4: Clean Up Fallout
Some glitter is bound to go rogue. Thankfully, a little tape is all you need to clean things up. “Make a little ring — adhesive side out — and gently roll over the glitter that has lost its way,” says Hatcher. “If you apply too much pressure it will also pull your foundation up, so keep things light.”
GLITTER TEARS STEP #5: Complete the Look
Once your glitter tears have dried down, go back in with mascara and eyeliner. “We keep this as the final touch so it doesn’t smear black or darker colors into the glitter,” says Hatcher. For mascara, we recommend the L’Oréal Paris Bambi Eye Washable Mascara to bring on the volume and drama. As for eyeliner, stick to your upper lash line to keep the focus on the tears below. Not sure what to do for a lip? Hatcher likes a nude option, which is perfect if you're rocking this look for an Instagram moment or to an Anti-Valentine's Day party. If a festival is in your future, though, go all out with a glitter lip.
Read More:
This Emerald Green Eyeshadow Look Is Everything
Beauty Q&A: What Is Brow Lamination?
Your Guide to Removing Every Type of Makeup Stain