


.jpg?cx=0.5&cy=0.5&cw=150&ch=120&blr=False&hash=27326E4FE66B0A2BFABAF4995DA29DC5)


Heat Style Your Hair in Summer Without Frizz
June 25, 2020


-
STEP 1: Start With Clean, Damp Hair
The first step to styling your hair in summer is to start with clean damp hair. Burnside says she likes to towel-dry her hair prior to styling to remove excess moisture.
![]()
-
STEP 2: Prep With Product
Burnside recommends applying a leave-in conditioner from the mid-lengths to the ends of your hair to give moisture, and use a volumizing primer at the roots to add extra lift and volume. Then, she recommends using the L’Oréal Paris Elvive Dream Lengths No Haircut Cream to help reduce frizz. It also provides heat protection and helps lock in your style.
![]()


-
STEP 3: Pre-Dry Your Hair
Use a blow dryer and dry your hair until it is roughly 80% dry, says Burnside. This helps to reduce the time it takes you to heat style your hair.
![]()
-
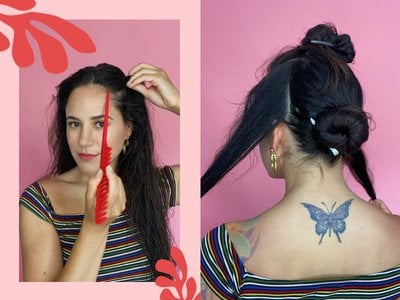
STEP 4: Section Your Hair
Once your hair is ready for heat, Burnside recommends sectioning the hair into different pieces to keep things organized and manageable. Section the sides of your hair first beginning from the top of the ear to the back of your head and secure it with a clip. With the remaining middle piece, section it into four equal parts beginning from the top of your head and ending at the nape of your neck. Make sure to secure each section with a clip.
![]()


-
STEP 5: Begin to Blow Dry
Once your hair is sectioned, blow dry the sides first using a round brush. If you want the hair to have more movement and bounce, use a wider round brush. Pro tip: Burnside recommends wrapping your hair in a velcro roller as soon as you finish blow drying each section to let it cool and help extend the life of your style. It also helps to create even more volume at the root. After you do the sides of your hair and set them in the velcro rollers, Burnsides recommends moving to the middle section. Beginning from the nape of your neck, continue to blow dry and set your hair in the rollers until you get to the crown of your head.
![]()
-
STEP 6: Spray Dry Shampoo at the Base
Once your hair is dried and in the rollers, Burnside says to spray the Garnier Fructis Invisible Dry Shampoo at the base and at the root of your hair. This step helps to lock in the style by removing any excess oils, while adding more volume.
![]()


-
STEP 7: Remove the Rollers
Once your hair is cool, remove the velcro rollers. Burnside likes to start with the rollers she set first, so in this case, the ones on the sides of your head.
![]()
-
STEP 8: Use a Texture Spray
After the rollers are out of your hair, Burnside recommends spraying the Garnier Fructis Texture Tease Dry Touch Finishing Spray as a final touch to give your hair even more volume and a little bit of hold.
![]()

