








.jpg?cx=0.5&cy=0.5&cw=150&ch=120&blr=False&hash=27326E4FE66B0A2BFABAF4995DA29DC5)




4 Beginner-Friendly Tutorials for Blending Your Makeup
July 22, 2026

How to Blend Foundation for a Second-Skin Finish
When it comes to blending foundation, an even—not cakey—finish is non-negotiable. After all, foundation is the base for your entire look. Whether you reach for a sponge or a brush, these are some steps to achieving a seamless complexion.
Using a Makeup Sponge
- Start with a damp sponge like the L'Oréal Paris Infallible Blend Artist Foundation Blender or the NYX Marshmallow Blender Sponge.
- Apply foundation to the back of your hand, not directly to your face or the sponge.
- Use a gentle tapping or “stippling” motion to press the product into the skin. Do not drag or swipe, as this creates streaks.
- Build coverage in thin layers, focusing on areas that need more.
Using a Foundation Brush
- Choose a dense brush, like the IT Cosmetics Heavenly Luxe Flat Top Buffing Foundation Brush #6.
- Use light, circular “buffing” motions to blend the product from the center of your face outward for an airbrushed effect.
- For hard-to-reach areas like around the nose, use the edge of the brush.
How to Blend Concealer and Contour for a Natural, Sunkissed Look
Contouring adds definition, dimension, and warmth to the skin. You know you did it right if you can’t tell that you’re wearing contouring makeup at all. For a seamless, sculpted appearance using concealer and contour, follow the steps below.
- Start with a concealer that’s just a shade or two lighter than your skin tone.
- Use a damp sponge or a brush like the NYX Professional Makeup Can't Stop Won't Stop Concealer Brush to gently dab concealer under your eyes, blending outward for a seamless finish. If using the brush, leverage the flat side to tap and press concealer over blemishes and the tapered tip to blend under the eyes.
- If your face is more on the flat side and you don’t have creases around your nose, feel free to extend concealer down towards the bottom of your nose and out along the cheekbones.
- For contour, choose a shade two to three shades deeper than your skin tone for the most natural effect. Apply sparingly.
- Using a dense makeup brush, place contour on the tops of your cheekbones.
- Add contour to the top corners of your forehead.
- Swipe contour along both sides of your jawline for extra definition.
- Blend each area with small, upward strokes—cheekbones blend toward concealer, forehead toward your hairline, and jawline out toward the bottom of your earlobes. A dense brush or damp sponge works well for this step.
- Finish by locking everything in with a translucent setting powder that closely matches your concealer (one or two shades lighter than your natural skin tone) for a smooth, brightened effect. This step can be achieved with the IT Cosmetics Heavenly Luxe™ French Boutique Blush Brush #4.
How to Blend Eyeshadow for a Soft and Seamless Effect
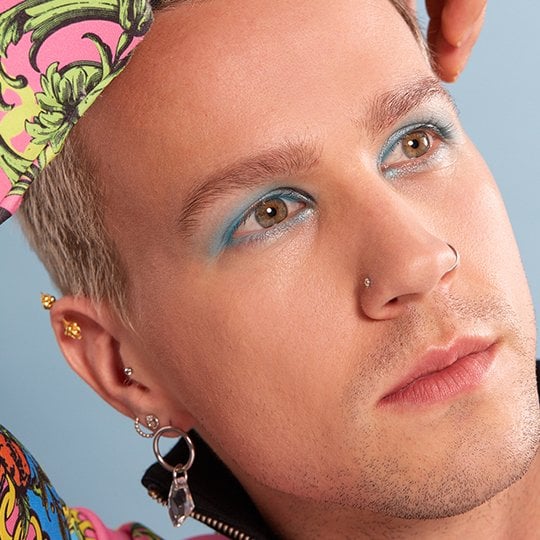
Perfectly blended eyeshadow can instantly elevate your makeup game, defining your eyes and making them appear larger and more lifted. Whether you’re after a sultry smoky look or something soft and natural, mastering the art of blending is key. Follow the steps below to achieve beautifully blended eyes.
- Prep your lids with a dot of eyeshadow primer or matte concealer. Pat it in with your finger to create a smooth base.
- Lightly set the primer or concealer with translucent powder using an eyeshadow brush, focusing on the crease and blending outward for seamless shadow application.
- Pick an eyeshadow brush that suits your eye shape and the intensity you want—when in doubt, go smaller for more control.
- Start with a transition shade slightly deeper than your skin tone. Use a blending brush, like the Urban Decay Pro Eyeshadow Brush - Tapered Blending E202, to sweep color above your crease and blend up toward the brow bone.
- With a clean, slightly smaller brush, apply a darker shade into your crease for added definition. Blend it into your transition shade using soft, windshield-wiper motions.
- Grab your smallest brush and reach for an even deeper shade. Tap onto the outer corner and softly blend across the crease for dimension.
- Mix a bit of your first and last shades together, then use your original blending brush to smooth everything along the crease and diffuse any harsh lines upward.
- Take your darkest shade yet on a small brush, tap off excess, and focus it on the outer crease. Wipe off the brush and gently blend to soften any edges.
- For extra softness, revisit the second shade you used and blend around the outer edge of your look.
- Go back in with your second-to-last darkest color to further blend out the outer edge for a seamless finish.
- Using a fluffy blending brush, dip back into your transition shade and buff over everything one last time to tie the look together.
- For the lid, press on your chosen shadow with your fingertip, then blend it out using a flat, tapered brush.
How to Blend Cream Blush for an Effortless Rosy Flush
Flushed cheeks complement virtually any makeup look; proper blending is key to keeping them soft and natural-not streaky. Mastering this step pulls your entire look together and adds a healthy glow to your complexion. Follow the steps below for a straightforward technique that makes blush look effortless.
For a Classic Look
- Dab cream blush onto a dry makeup sponge.
- Tap the sponge on the back of your hand to remove any excess product.
- Press the sponge onto your cheeks, applying blush just above the apples and focusing on the center of your face. Use a tapping motion—avoid dragging or buffing.
- Flip to the clean side of your sponge and gently diffuse the edges for a seamless blend.
- For a fresh, cohesive look, lightly tap any leftover blush from the sponge onto the bridge of your nose.
For a Sculpted Look
- Start by dabbing your flush-colored blush onto a dry makeup sponge.
- Tap the sponge on the back of your hand to remove any excess product.
- Press the sponge along the bottom of your cheekbone, following its curve upward to sculpt and lift your cheeks.
- Blend the blush up toward your hairline and temple for a seamless, lifted effect.
- For dimension, pick a second blush with a slightly bronzed or taupe tone.
- Apply this deeper shade wherever you want extra lift—looking straight into the mirror, place it right under your cheekbone toward the back of your cheek.
- Blend using your fingertips, pressing upward rather than dragging down.
- Finish by gently pressing your sponge across both blush shades to ensure everything is beautifully blended.
For Under Your Eyes
- Dab liquid blush onto the back of your hand and tap off any excess.
- With a brush or sponge, pat the blush in a straight line from just below your pupil outward—don’t shy away from getting close to your lower lash line, as this placement gives a fresh, lifted effect.
- Blend the blush upward along your cheekbone for a seamless, natural-looking flush.
Product selections are made using editorial research and brand knowledge; personal use or testimonials are noted where applicable.


Read more