Step Out of the Box With This Boxy Eyeshadow Look
September 01, 2020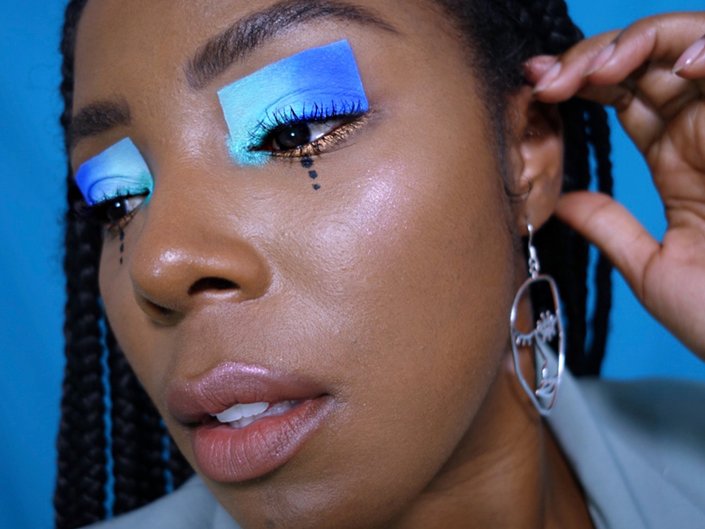
-
STEP 1:
Tape Off Your Squares
Williamson says that the key to this look is to apply tape before using anything else on your eye. Cut three pieces of tape for each eye. Apply the tape in a square shape around the eye, with one piece of tape under the brow, another on the outside of the eye and the last one on the inner corner. Williamson explains that this step will ensure that the placement of the shadow will be even and precise.
![]()
-
STEP 2:
Prep With a Shadow Primer
Apply the Urban Decay Eyeshadow Primer Potion in Freebase, which is an opaque white, all over the eye inside the tape. This will help make your eyeshadow pop and last longer.
-
STEP 3:
Apply the First Shadow Shade
Next, using the Urban Decay Wired Palette, Williamson applied the shade Fluorescent, a pastel blue color, from the inner corner of the eye to halfway across the eyelid. She recommends using a compact, firm eyeshadow brush to pack the shadow on for the most pigment.
-
STEP 4:
Tap the Second Shadow Shade
With a clean eyeshadow brush, apply the royal blue color Chaos from the same Wired palette on the outer corner of the eye until it meets Fluorescent. To create that seamless gradient where both of the shades meet, Williamson says to layer the colors on top of one another until they blend and create an ombré effect.
![]()
-
STEP 5:
Fill In Your Inner Corners
Fill in the inner corners with the shade Current, a sparkling green, with a smudger brush. “This adds a little bit of an accent and pop to the overall look,” says Williamson.
![]()
-
STEP 6:
Line Your Lower Lash Line
Finish your eyeshadow look with some gold eyeliner on the lower lash line. For this step, Williamson used the Urban Decay 24/7 Glide-On Eyeliner Pencil in Goldmine.
-
STEP 7:
Draw on the Dots
Using a black liquid eyeliner, apply three dots down the middle of each eye. The key for making these dots centered is to look straight ahead when applying them and not to place them too close to one another.
![]()
-
STEP 8:
Swipe on Mascara
Complete the entire look by applying mascara on your top and bottom lashes. If you need a recommendation, the Urban Decay Lash Freak Volumizing Mascara curls lashes for a dramatic, elongated effect.
![]()




.jpg?cx=0.5&cy=0.5&cw=150&ch=120&blr=False&hash=27326E4FE66B0A2BFABAF4995DA29DC5)

