.jpg?cx=0.5&cy=0.5&cw=150&ch=120&blr=False&hash=27326E4FE66B0A2BFABAF4995DA29DC5)


This Negative Space Rainbow Eye Makeup Doesn’t Even Look Real
February 25, 2021

-
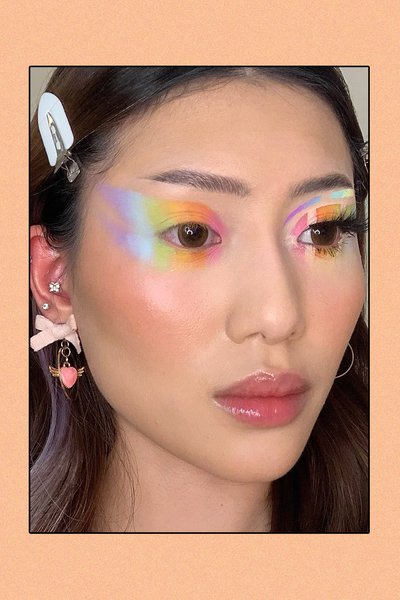
STEP 1:
Apply Your Rainbow
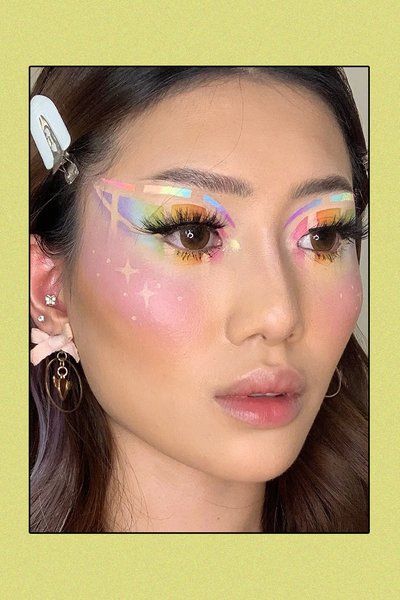
Adelaide used the NYX Professional Makeup Brights Ultimate Shadow Palette to create a rainbow eye look both above and below the eyes with two wings. She started with the bright pink shade around the tear duct and finished with the lavender. Once all of the colors were applied, she blended the edges of each shade for a soft, seamless effect.
![negative-space-eyeshadow-tutorial]()
-
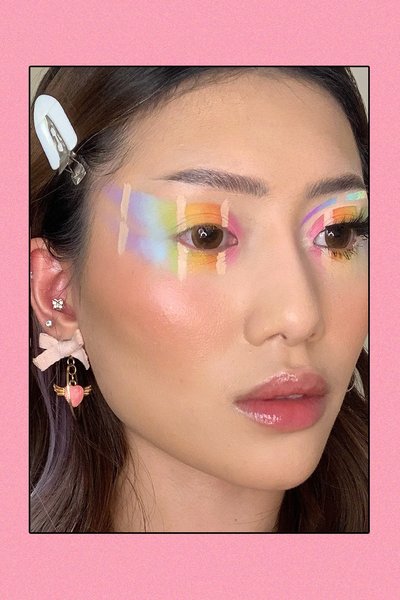
STEP 2:
Create the Negative Space
Using a small detail brush dipped into concealer, Adelaide painted three even vertical lines — one between the pink and orange shades, one between the yellow and green shades and one just before the end of each wing. She then applied another swipe of concealer from the outer corner of the eyes up to the tip of the top wing. Finally, she outlined the top and bottom of the rainbow eyeshadow with concealer.
![negative-space-eyeshadow-tutorial]()
-
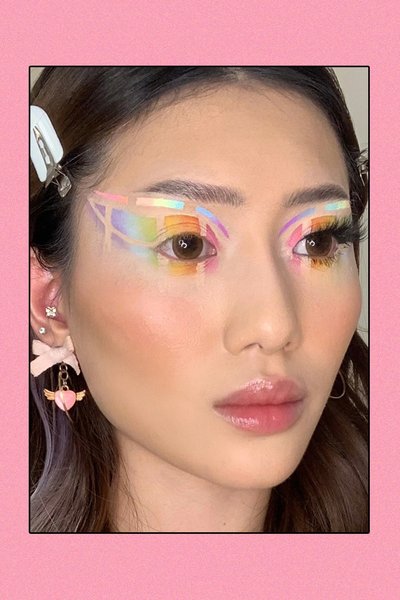
STEP 3:
Create the Graphic Eyeliner
From her inner crease up to her brow bone, she painted three staggered, multi-colored lines to create the floating eyeliner. She used the same color palette as the eyeshadow, but in reverse order (i.e., she started with purple and ended with pink). She also made sure that the spaces between the three lines did not overlap with the negative spaces below.
![negative-space-eyeshadow-tutorial]()
-
STEP 4:
Finish the Eye Look
For finishing touches, Adelaide applied a thin layer of eyeliner along the top lash line and popped on some dramatic falsies.
![negative-space-eyeshadow-tutorial]()
-
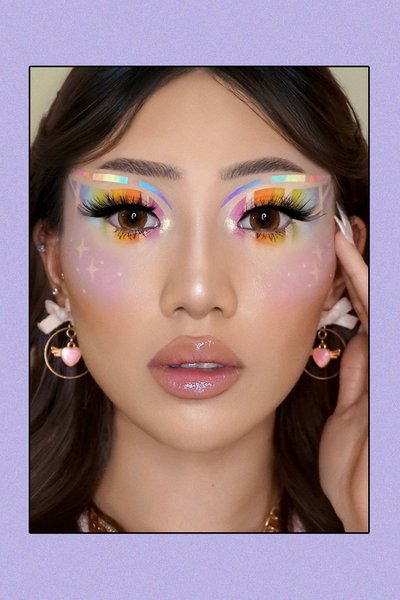
STEP 5:
Go Wild With Blush
“Choose a pigmented blush and go ‘ham’ with it across your cheeks and cheekbones,” says Adelaide. For extra credit, she carved out some small dots and stars with concealer to create a dreamy, negative space cheek look.
![negative-space-eyeshadow-tutorial]()
-