.jpg?cx=0.5&cy=0.5&cw=150&ch=120&blr=False&hash=27326E4FE66B0A2BFABAF4995DA29DC5)


Hair Styling
Want to perfect your at-home blowout? Looking for hairstyle inspo for your next big event? Read on to learn about new styling techniques and products that’ll transform your hairstyling routine.


Recommended Articles
-
![Photo of a person wearing a wig collaged on a blue graphic background]() Hair Styling4 Black-Owned Wig Brands and Collections to Shop This Holiday Seaso...11/22/2023
Hair Styling4 Black-Owned Wig Brands and Collections to Shop This Holiday Seaso...11/22/2023 -
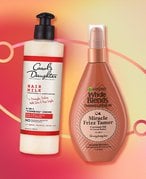
![Two Hair products for flyaways on colorful background]() Hair StylingFight Flyaways and Frizz With Our Favorite Hair Products11/14/2023
Hair StylingFight Flyaways and Frizz With Our Favorite Hair Products11/14/2023 -
![Picture of a model with dark, curled hair]() Hair StylingHow to Curl Your Hair at Any Length10/5/2023
Hair StylingHow to Curl Your Hair at Any Length10/5/2023 -
![Picture of a model with black wavy hair and a peach colored blouse]() Hair Styling8 Easy Wavy Hair Tutorials to Try9/27/2023
Hair Styling8 Easy Wavy Hair Tutorials to Try9/27/2023 -
![person wearing box braids]() Natural HairItchy Scalp? Try Soaking Your Synthetic Hair in Apple Cider Vinegar9/12/2023
Natural HairItchy Scalp? Try Soaking Your Synthetic Hair in Apple Cider Vinegar9/12/2023 -
![Person with hair styled in passion twists in a half-up, half-down bun]() Hair Styling6 Passion Twist Hairstyles We're Loving Right Now9/8/2023
Hair Styling6 Passion Twist Hairstyles We're Loving Right Now9/8/2023