.jpg?cx=0.5&cy=0.5&cw=150&ch=120&blr=False&hash=27326E4FE66B0A2BFABAF4995DA29DC5)


This Santa Hat Manicure Is Coming to Town
December 04, 2020

-
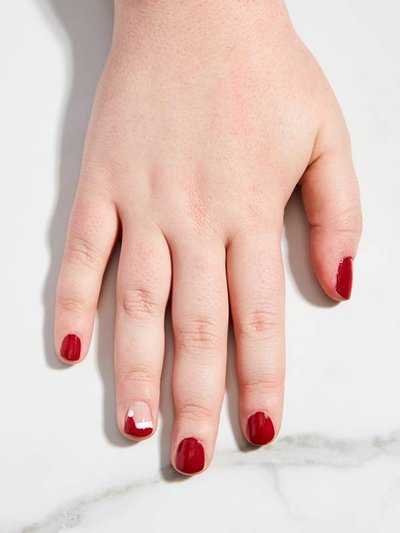
STEP 1:
Apply a Base Coat
Nothing puts us in a jolly mood quite like the perfect red. After applying the Essie Here to Stay Base Coat, polish your nails with Essie Fishnet Stockings. Make your strokes as even as possible. The color is pretty opaque, so you shouldn’t need more than one coat. Leave your ring finger polish-free — it’s going to be your accent nail.
![This Santa Hat Manicure Is a Major Holiday Mood]()
-
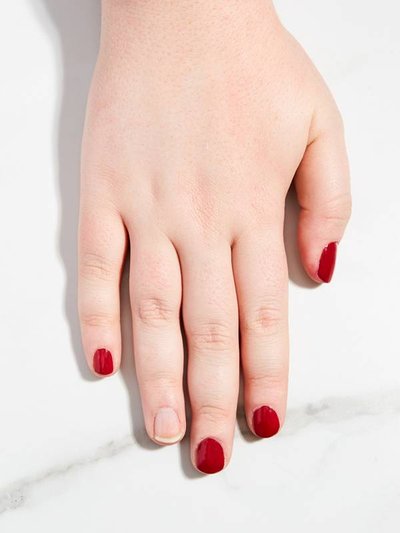
STEP 2:
Draw a French Tip
Switch your focus to the accent nail and paint on a French tip with the red polish. You can free-hand the tip with the nail polish brush — it doesn’t have to be a flawless stroke; you’ll be smudging the base later.
![This Santa Hat Manicure Is a Major Holiday Mood]()
-
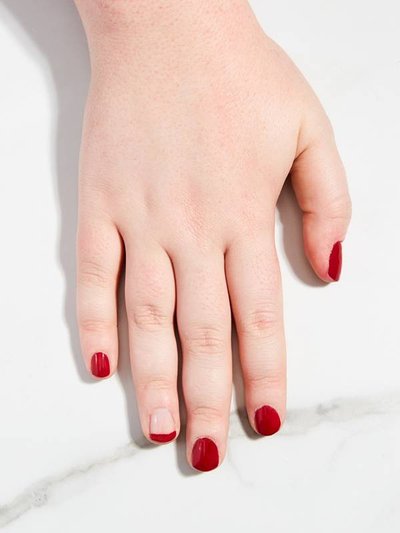
STEP 3:
Don’t Forget the Hat!
Now it’s time to really amp up the artistry. Swap out your nail polish brush for a detail brush. Dip it into the red polish and wipe any excess or clumps off on the side of the bottle so you have a very thin, light coating. Draw an upside-down triangle on one side of your nail. You should start your downward slant just off-center. The tip of the triangle should almost touch your cuticle. Once you’re happy with the shape, fill in the clear space with your polish. Make sure that it dries completely before moving on.
![This Santa Hat Manicure Is a Major Holiday Mood]()
-
STEP 4:
Snowy Accents
Using Essie Blanc, or Essie Twinkle in Time if you want some sparkle, lightly dab the bottom of the triangle to create a white pom-pom. Using the same detail brush, draw dots along the base of your French tip. This will look like the white fur that lines Santa’s hat. Have fun with it — it can be a little messy. Let your nail art dry completely before applying the final clear top coat.
![This Santa Hat Manicure Is a Major Holiday Mood]()