Recreating This Fun, Firework Eye Makeup Will Put Your Makeup Skills to the Test
May 11, 2020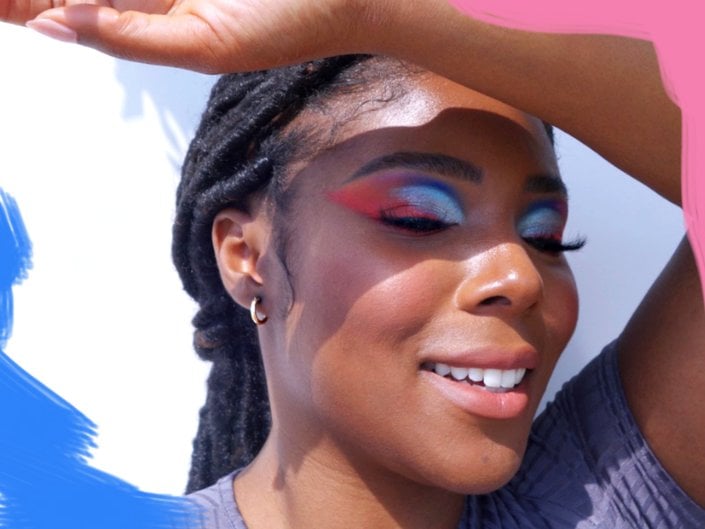
-
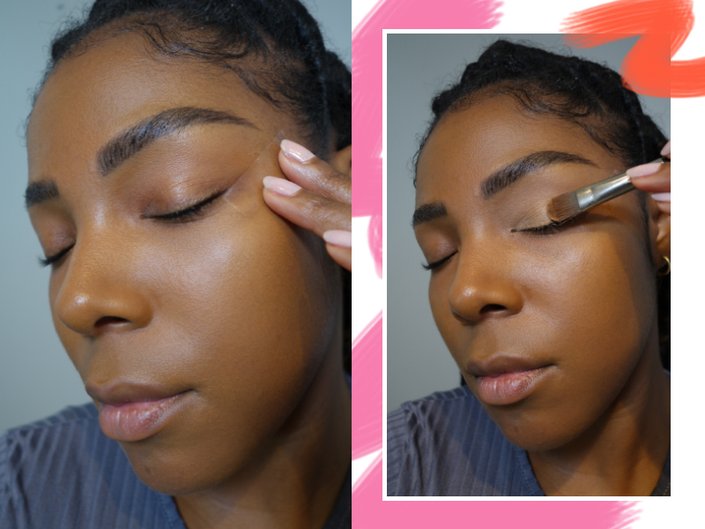
STEP 1: Apply Tape
First, Williamson recommends applying tape on the outer corner of your eyes on an angle going towards the tail of your eyebrow. “This is going to act as a guide to make sure that the eyeshadow is really crisp when you remove the tape,” she says.
-
STEP 2: Prime Your Eyes
Next, use an eyeshadow primer like the Urban Decay Eyeshadow Primer Potion to prime the lids. This will ensure that your eyeshadow stays in place, doesn’t crease and is super vibrant upon application.
![]()
-
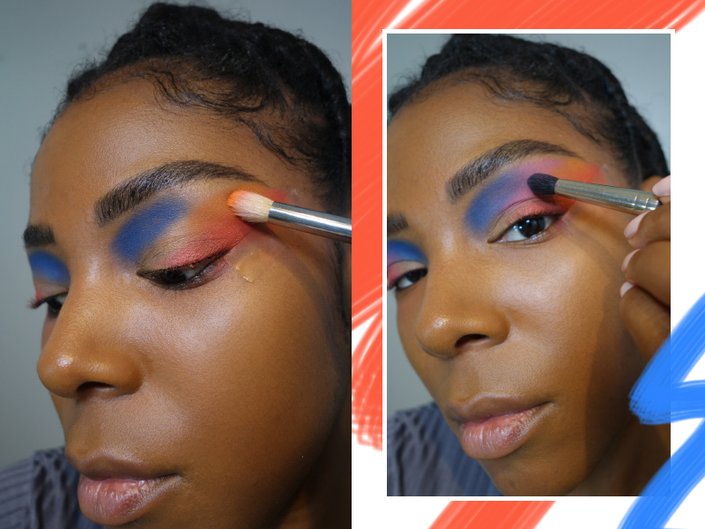
STEP 3: Apply the Red Eyeshadow on the Outer Corner of the Eyes
For this look, Williamson used the Urban Decay Wired Palette. First, she says to apply the red shade Slowburn using a fluffy shadow brush. Focus the shadow across the entire upper lash line, working your way to the brow bone, following the edge of the tape. Then blend inwards toward the crease and lid.
![]()
-
STEP 4: Apply the Orange Shade
Moving onto the next shade, Williamson says it’s important to use a new, clean fluffy blender brush to avoid any muddiness. Apply the orange color Switch right where the red shadow ends and blend the two colors right where they meet, so that there are no harsh lines. Take the orange shade and apply it a little more inward on the lid and crease, taking it up to the brow bone.
![]()
-
STEP 5: Create Your Cut-Crease Guide
Next, Williamson explains how to apply the blue shade, Chaos, on the inner corner above the tear duct in a curved shape. Think of it like a parenthesis, she says Remember to use a clean blender brush for this shade, too.
-
STEP 6: Fill in the Gap
In between the orange and blue shade, Williamson recommends applying the pink shade, Savage, using a clean brush. “This shadow you want to apply between the orange and blue, but only above the crease, not on the lid,” she says. You can diffuse the color by blending it towards the brow bone to avoid harsh lines.
-
STEP 7: *Optional* Add a Purple Shade
This step is optional. Williamson applied the shade, Shock, right next to the blue hue and blended it into the pink. This gives the eyeshadow an effortless ombré effect.
-
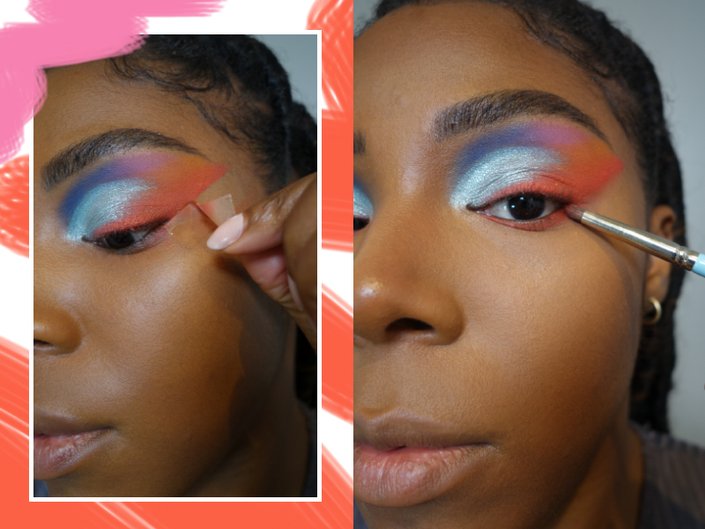
STEP 8: Prep for the Glitter Shadow
To finish off the lid, take a cream eyeshadow primer or concealer and apply it beginning at the tear duct. Bring the primer up into the crease to create a cut-crease effect. Fill in the rest of the eyelid with your primer, stopping right below the orange shade.
![]()
-
STEP 9: Apply the Glitter Eyeshadow
On top of the cream eyeshadow base, first apply Fluorescent, a light teal. Then layer on a shimmer blue eyeshadow to create some shimmer and contrast.
![]()
-
STEP 10: Remove the Tape
Next, remove the tape and apply the first red shade, Slowburn, on the lower lash line to bring the entire look together.
![]()
-
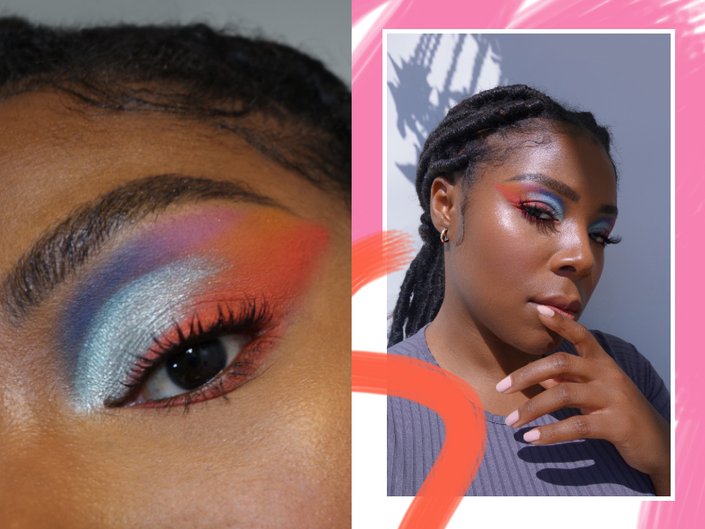
STEP 11: Finish Off With Mascara
Finish off the look with your favorite mascara on your top and bottom lashes. We love the Maybelline New York Falsies Lash Lift Mascara if you’re in need of a new tube. For an added boost, feel free to pop on some falsies, like Williamson did here, and your firework look is complete.
![]()
-












.jpg?cx=0.5&cy=0.5&cw=150&ch=120&blr=False&hash=27326E4FE66B0A2BFABAF4995DA29DC5)

