








.jpg?cx=0.5&cy=0.5&cw=150&ch=120&blr=False&hash=27326E4FE66B0A2BFABAF4995DA29DC5)




Why Your Bronzer, Contour, and Blush Don’t Look Right
August 05, 2026

Key Takeaways
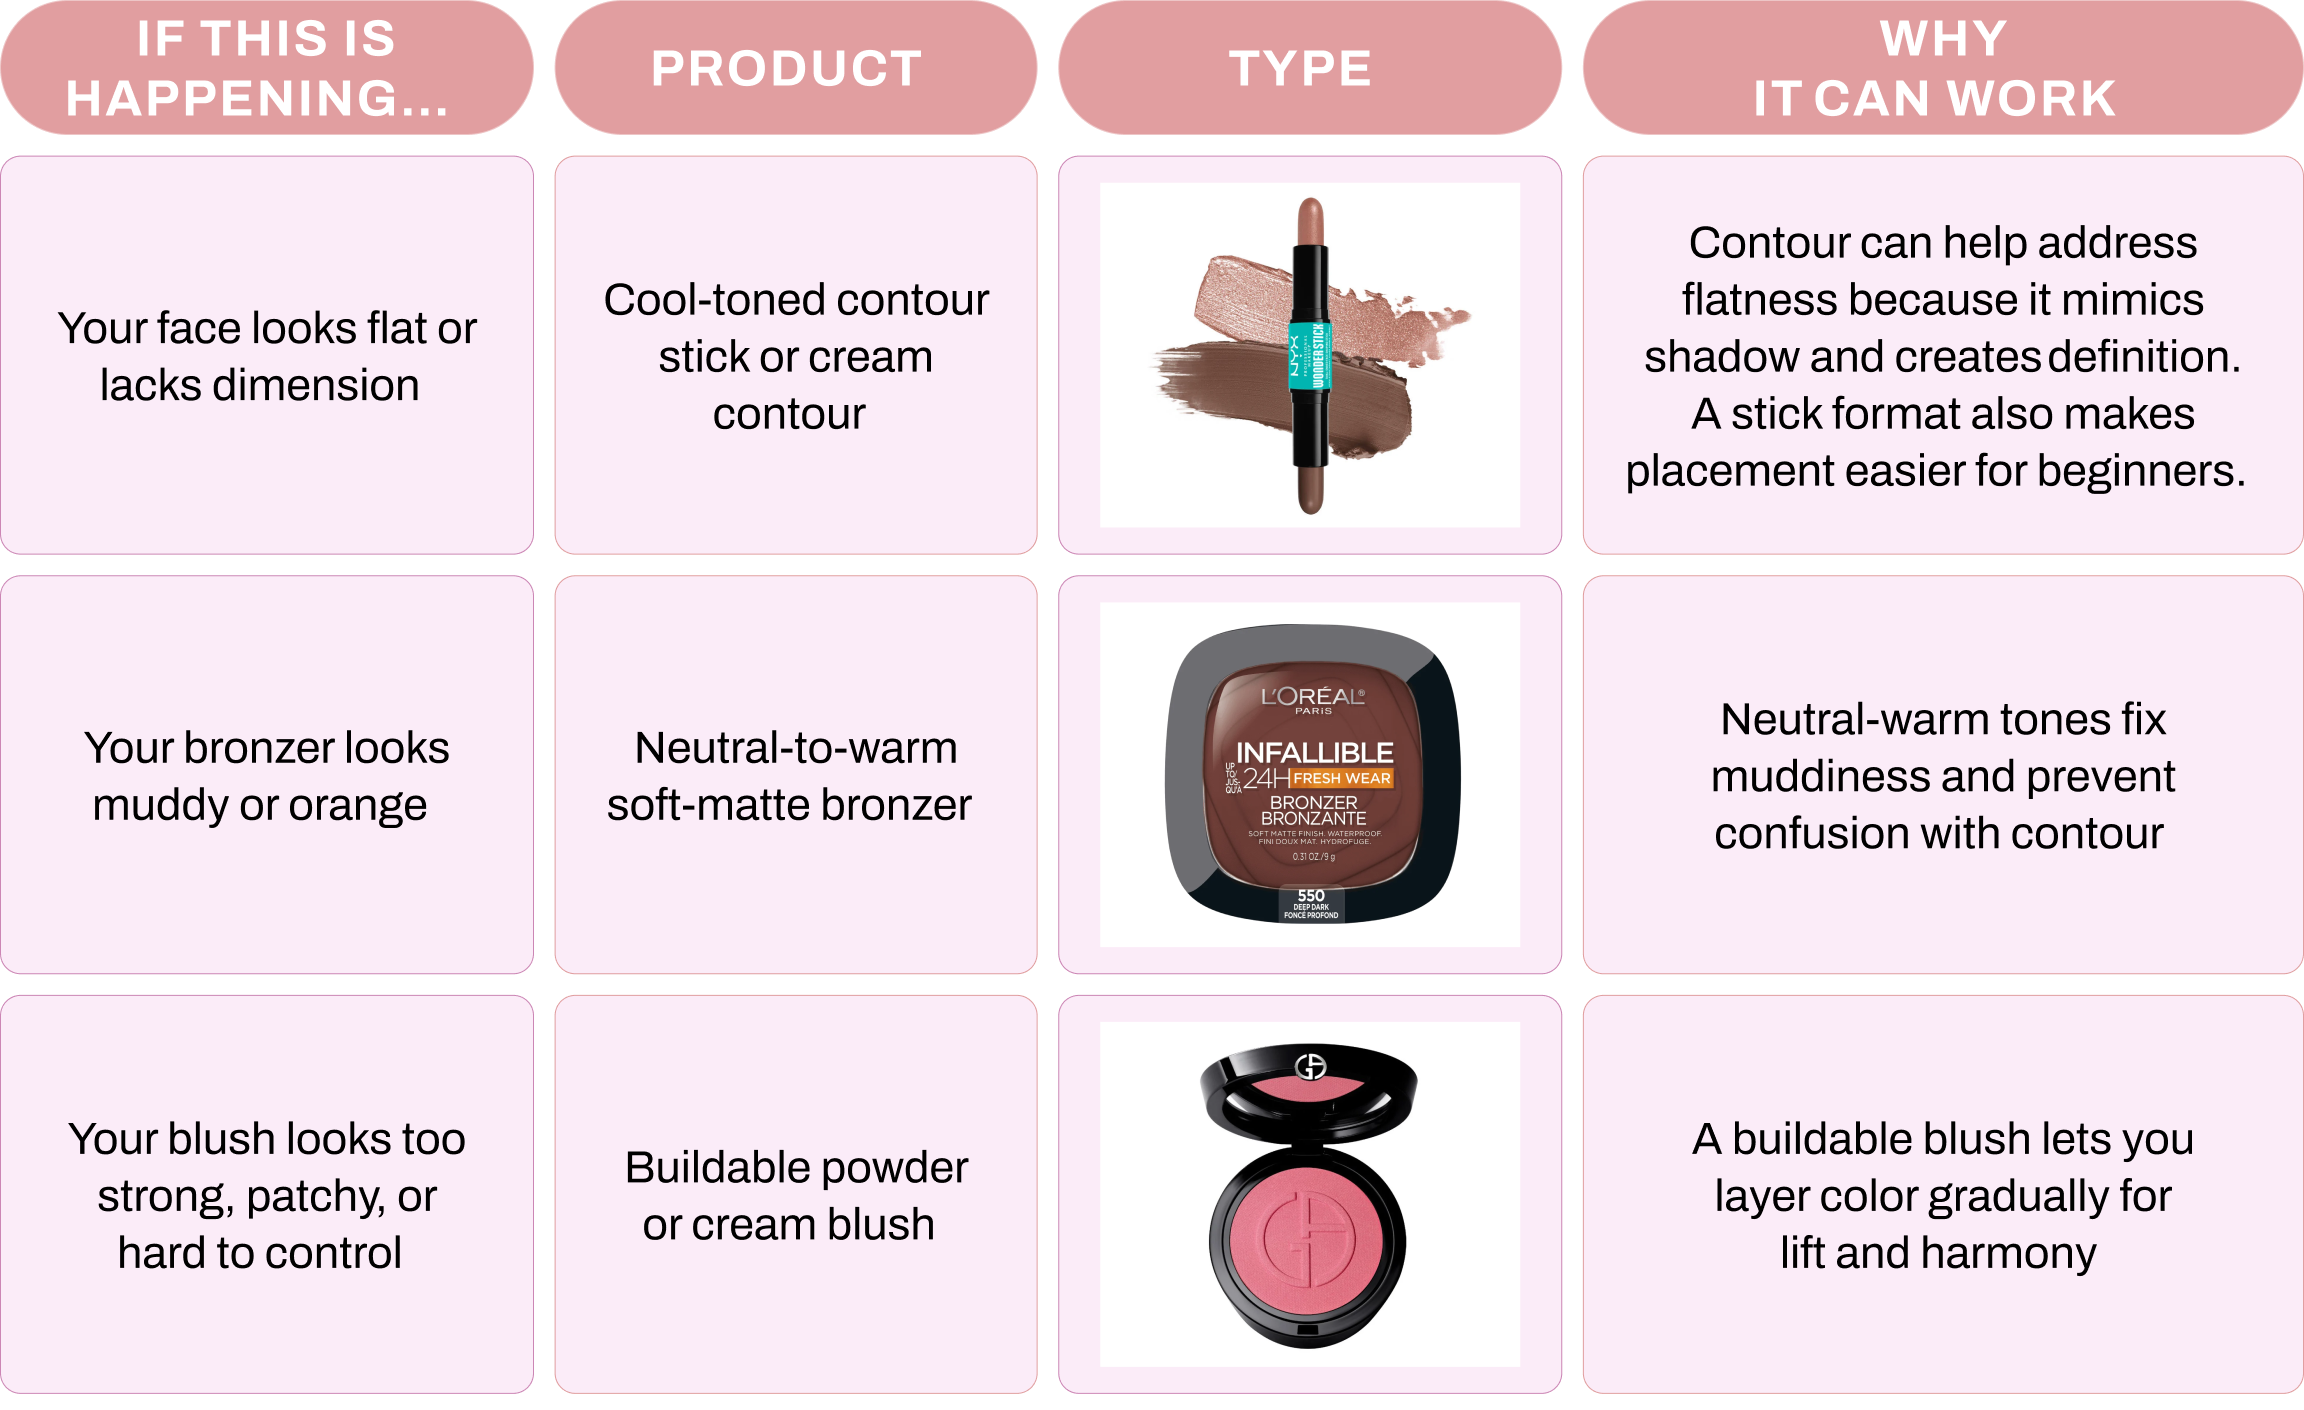
- For creating natural-looking shadows when your face looks flat, use a cool-toned, matte contour product applied in the hollows of your face, like NYX Professional Makeup Wonder Stick.
- Use warm-toned bronzer, like L’Oreal Paris Infallible Up to 24H Fresh Wear Soft Matte Bronzer or NYX Professional Makeup Buttermelt Bronzer, where the sun would naturally hit to add sun-kissed warmth.
- For adding color without patchiness or heaviness, choose a buildable blush formula that lets you tap on color gradually and blend upward for a lifted effect, like Giorgio Armani Beauty Luminous Silk Glow Blush.
Ever look in the mirror and wonder why your bronzer appears muddy, your contour looks harsh, or your blush sits in odd patches? You’re not alone. Many people struggle with cheek makeup, but most mistakes trace back to three things: picking the wrong formula, placing it incorrectly, or skipping crucial blending steps.
The good news? Getting your bronzer, contour, and blush to work with your features—rather than against them—is totally doable. Ahead, discover the most common mistakes with bronzer, contour, and blush, plus the simple rules to help achieve a more polished finish.
If Your Cheek Makeup Looks Off, You May Be Using Bronzer and Contour Interchangeably
If your cheek area looks muddy, orange, flat, or too sharply defined, you might be confusing bronzer and contour, or “stacking” them incorrectly. Here’s what each is intended for:
- Contour is meant to mimic shadow and sculpt the face. It should be cool-toned, matte, and applied where shadows naturally fall (under the cheekbones, jawline, temples).
- Bronzer is for adding warmth—think of it as a sun-kissed boost. It’s typically warm-toned and can be matte or have a subtle sheen, applied to the high points of your face.
If Your Face Looks Flat, Use Contour to Add Shadow
Contours help create the illusion of depth to sculpt and define your facial structure. Because shadows are naturally more gray and cool, choose a contour that’s a couple of shades deeper than your skin with a cool or neutral undertone (think taupe, grey-brown) and zero shimmer.
If Your Skin Looks Dull, Use Bronzer to Add Warmth
Bronzers brighten and revive the complexion by mimicking where the sun hits—forehead, cheekbones, chin, and nose. Sunset colors—golden or reddish brown—bring warmth without adding unwanted orange stripes or “shadow.”
Cheat Sheet: What to Use and When
How to Address Bronzer, Contour, and Blush Mistakes
Understanding product purpose sets you up for success, but recognizing application mistakes gets you more polished results. Here’s how to fix the four most common issues:
Mistake #1: Your Contour or Bronzer Looks “Muddy”
A muddy or “dirty” look usually means the bronzer is too dark or warm, or products have been over-blended together. It can also come from applying powder on unset liquid foundation.
Solution: Let foundation set first, use a separate brush for each product, and ensure your contour is cool-toned and matte.
Mistake #2: You Have a Harsh Stripe of Color (the “Unblended” Look)
If you see a hard line, the formula may be too pigmented or you’re using a dense brush with too much pressure.
Solution: Start with less product and build up slowly. Use a fluffy brush and blend in light, circular motions. Always soften and diffuse the edges with a clean brush.
Mistake #3: Your Cheek Makeup Looks Patchy
Patchiness often happens from layering creams over powders, or from not setting foundation before adding powder products.
Solution: Apply creams before powders, and ensure your base is dry and smooth before layering.
Mistake #4: Your Blush Is Placed Too Low Or Too Close To Your Nose
Placement can make or break the look. Low or inward blush can drag the face down and blush placed too close to the nose can make the face look crowded.
Solution: Smile to find the apples, apply blush there, then sweep it up and out toward the temples for a natural, lifted effect.
Where to Place Bronzer, Contour, and Blush So They Look Natural
Even the perfect shades won’t look right if placement is off. Here’s your easy map for a flattering look:
- Contour: Find the natural hollow below your cheekbone (try the “fish face” trick). Apply contour from ear to about two-thirds of the way toward your lips—not all the way in. Add a little along the jawline and hairline/temples for balance.
- Bronzer: Sweep bronzer in a gentle “3” shape along the perimeter of your face—from forehead along the hairline, to the high points of cheeks, and along the jaw. Dust a bit across the nose for a sun-kissed look.
- Blush: Apply starting at the apples of your cheeks and blend up, not down, toward your temple—this lifts instead of drags the face.
For more tips on where to apply bronzer based on your face shape, check out this article.
Common Application FAQs
Should you apply cream or powder first?
Always apply cream formulas before moving on to powder. Powder before cream = patchiness and poor blending.
In what order should you apply contour, bronzer, and blush?
After your base: Contour first for depth, bronzer next for warmth, and blush last for a natural flush or pop of color.
How do I pick the right shades of bronzer, contour, and blush for my skin tone?
Start by identifying your undertone—cool, warm, or neutral. For contour, choose a cool or neutral shade (think ash or taupe) a couple of shades darker than your skin; this mimics natural shadows and avoids an orange cast. For bronzer, opt for a warm, golden, or reddish-brown shade—something that looks like a healthy tan, not a stripe of color. Blush is the most forgiving, but pick tones that naturally flush your complexion—rosy or berry for fair skin, peach or apricot for medium, and vibrant mauve or brick for deep skin tones.
Better Bronzer, Contour, and Blush
Getting flawless cheeks is about more than “blending it out.” By matching products to their purpose—cool tones for shadow, warm tones for sunlit glow, and gradual layering for color—plus adjusting your placement and technique, you’re more likely to achieve a polished, face-flattering look.
For more blush tips, check out ways you might be wearing blush wrong or learn the core differences between bronzer vs. contour.
Product selections are made using editorial research and brand knowledge; personal use or testimonials are noted where applicable.


Read more