.jpg?cx=0.5&cy=0.5&cw=150&ch=120&blr=False&hash=27326E4FE66B0A2BFABAF4995DA29DC5)


Face
Want a flawless foundation finish? Searching for the secret to natural-looking blush? Consider this your one-stop-shop for perfecting your face makeup routine.


Recommended Articles
-
![Photo of a person showing how to use lipstick as blush]() FaceHow to Use Lipstick as Blush — Plus, the Best Ones to Try1/30/2026
FaceHow to Use Lipstick as Blush — Plus, the Best Ones to Try1/30/2026 -
![]() FaceDewy vs. Matte Makeup: Which Is Right for You?3/28/2025
FaceDewy vs. Matte Makeup: Which Is Right for You?3/28/2025 -
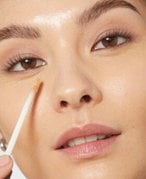
![A person applying a concealer to cheek]() ConcealerHow and Where To Apply Concealer—Plus 10 Editor-Approved Options To...11/14/2024
ConcealerHow and Where To Apply Concealer—Plus 10 Editor-Approved Options To...11/14/2024 -
![Close-up image of someone looking to the side of the camera and applying a mascara wand to their eyelashes]() FaceWhat’s The Correct Order To Apply Makeup?10/12/2024
FaceWhat’s The Correct Order To Apply Makeup?10/12/2024 -
![Unleash the Power that is the NEW Face Glue!]() FaceUnleash the Power that is the NEW Face Glue!9/12/2024
FaceUnleash the Power that is the NEW Face Glue!9/12/2024 -
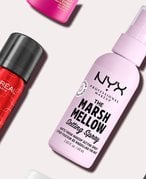
![setting sprays collaged onto a pinkish white background]() FaceHow and When to Use Setting Spray, Plus Our Favorite Long-Lasting F...8/26/2024
FaceHow and When to Use Setting Spray, Plus Our Favorite Long-Lasting F...8/26/2024